Octashelf - Geometric Wood Design
Some time ago, I was taking a mental break at work and decided to draw some geometric shapes using my grid-dotted paper. Doodling for relaxation, I finished what was a bunch of octagons stuck together with 4 smaller squares in the design. I thought it was pretty neat and held on to it for a few weeks.
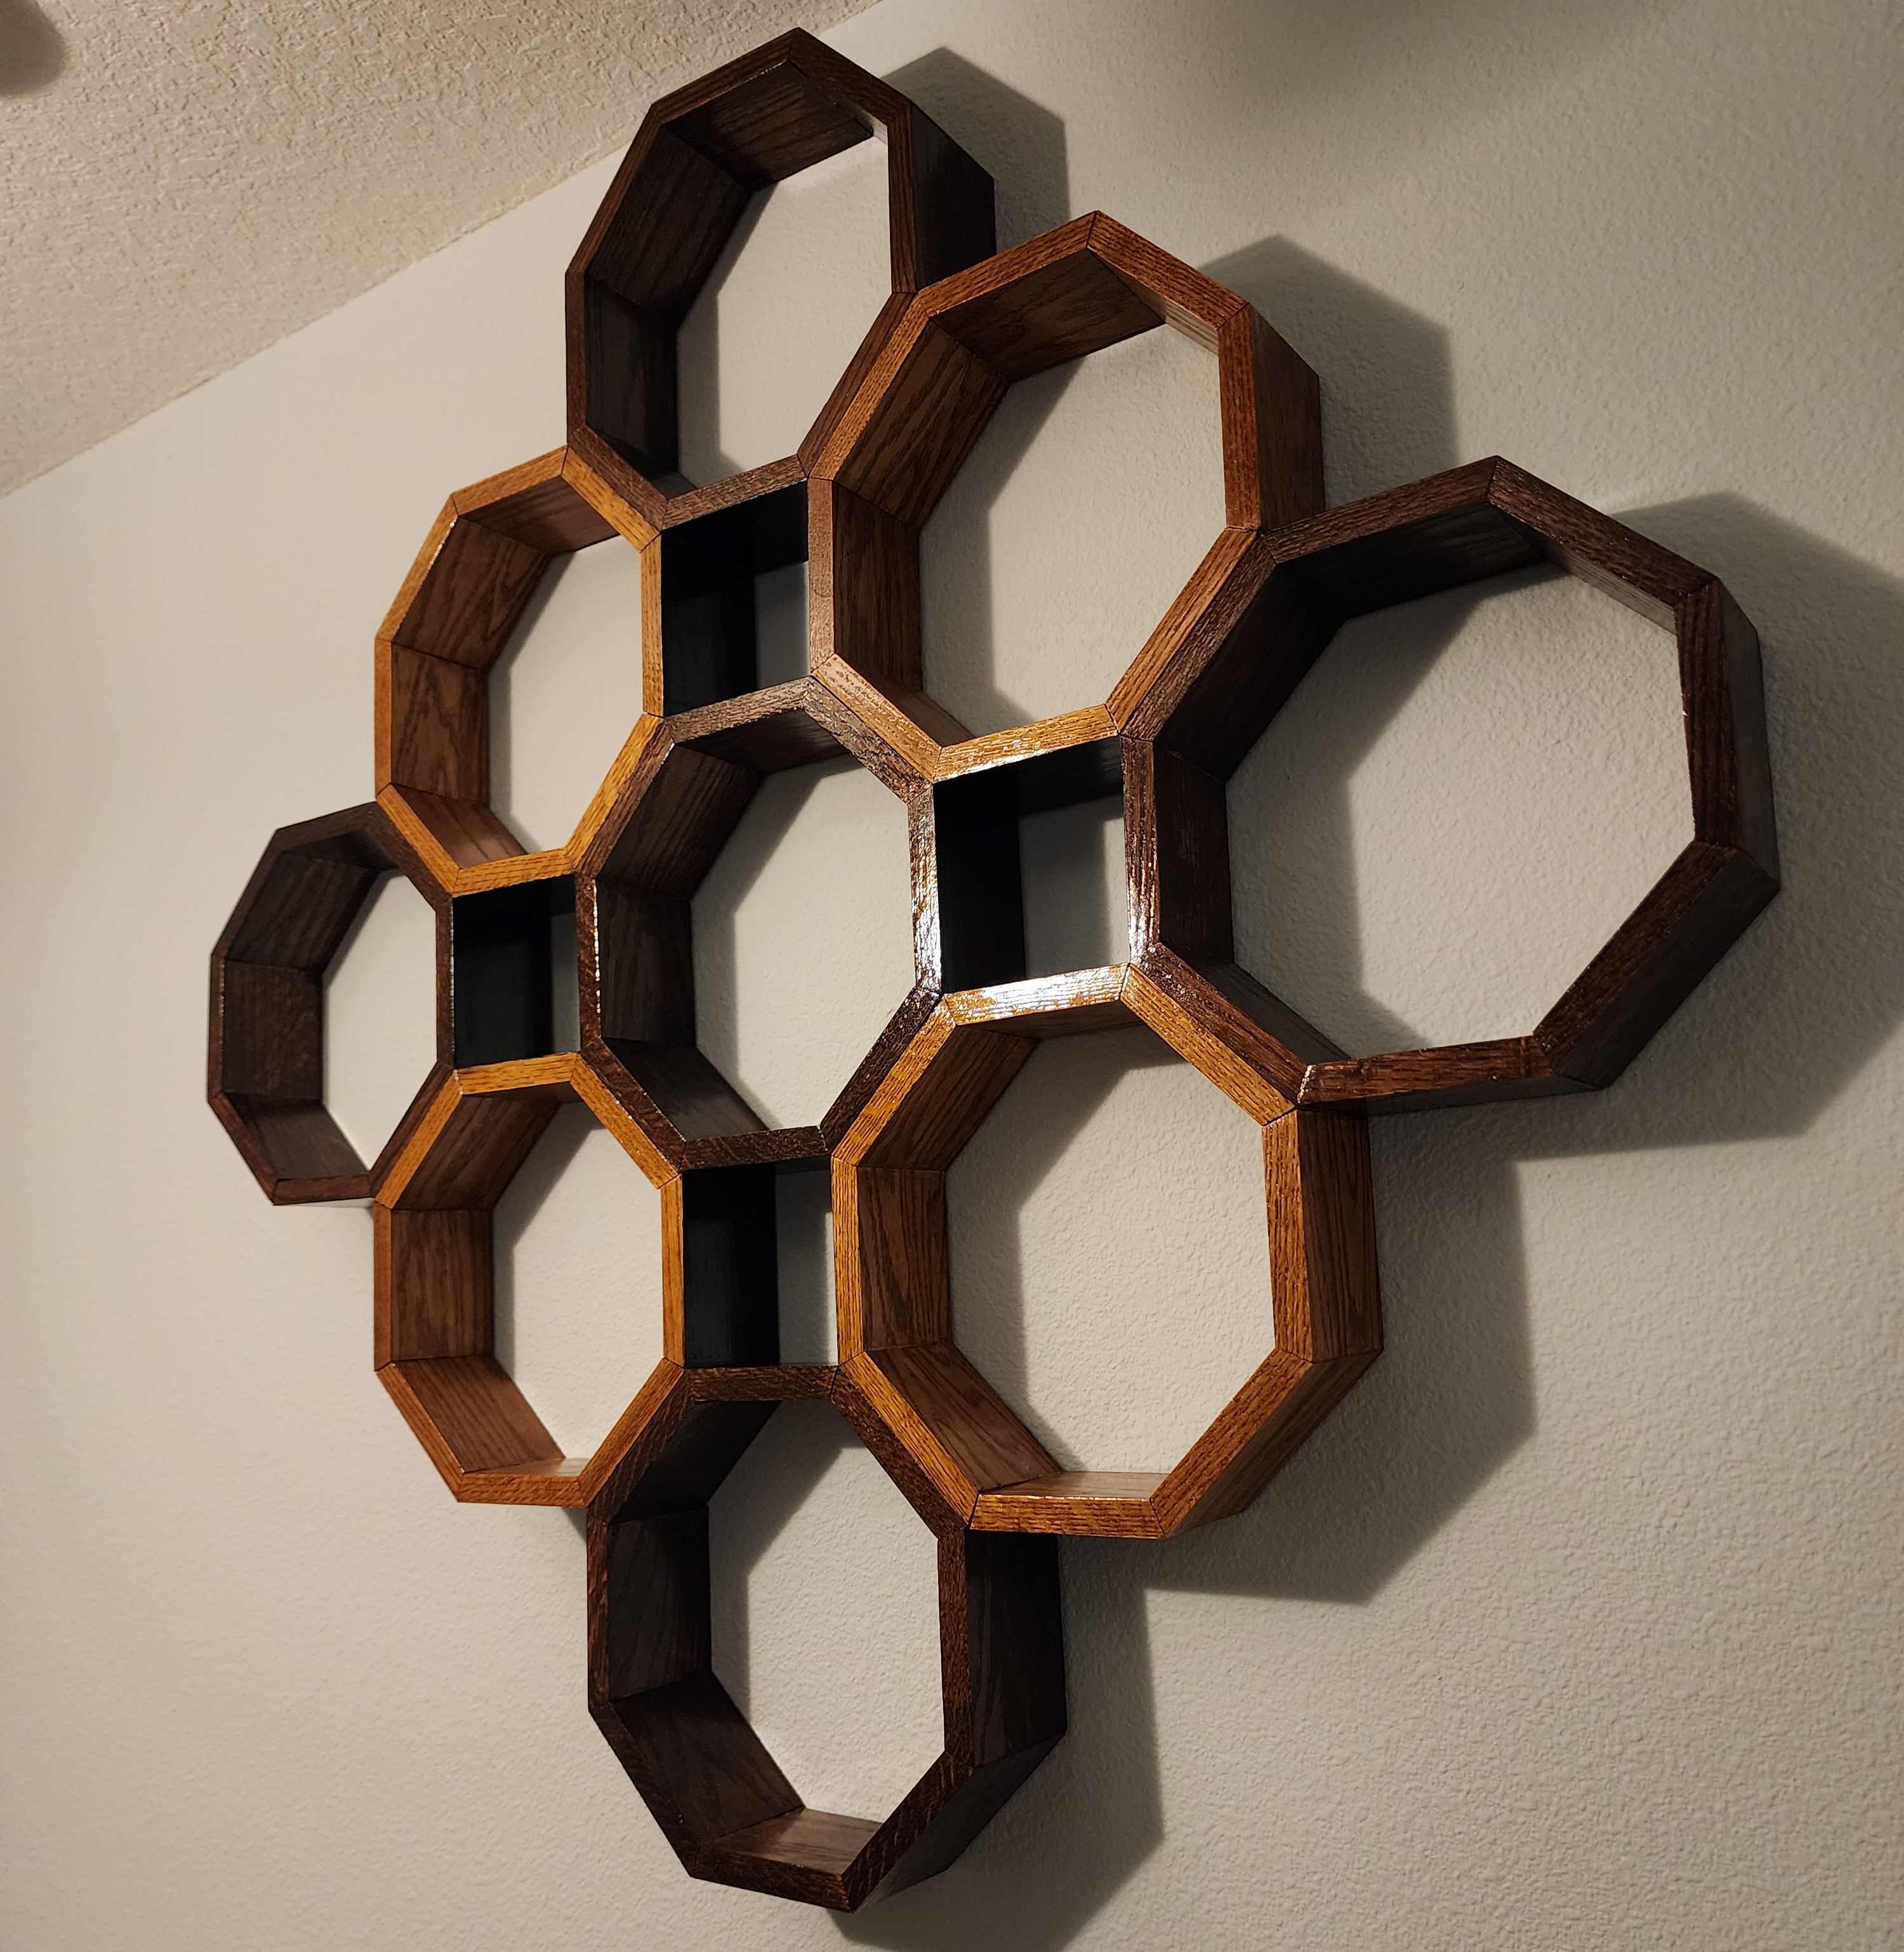
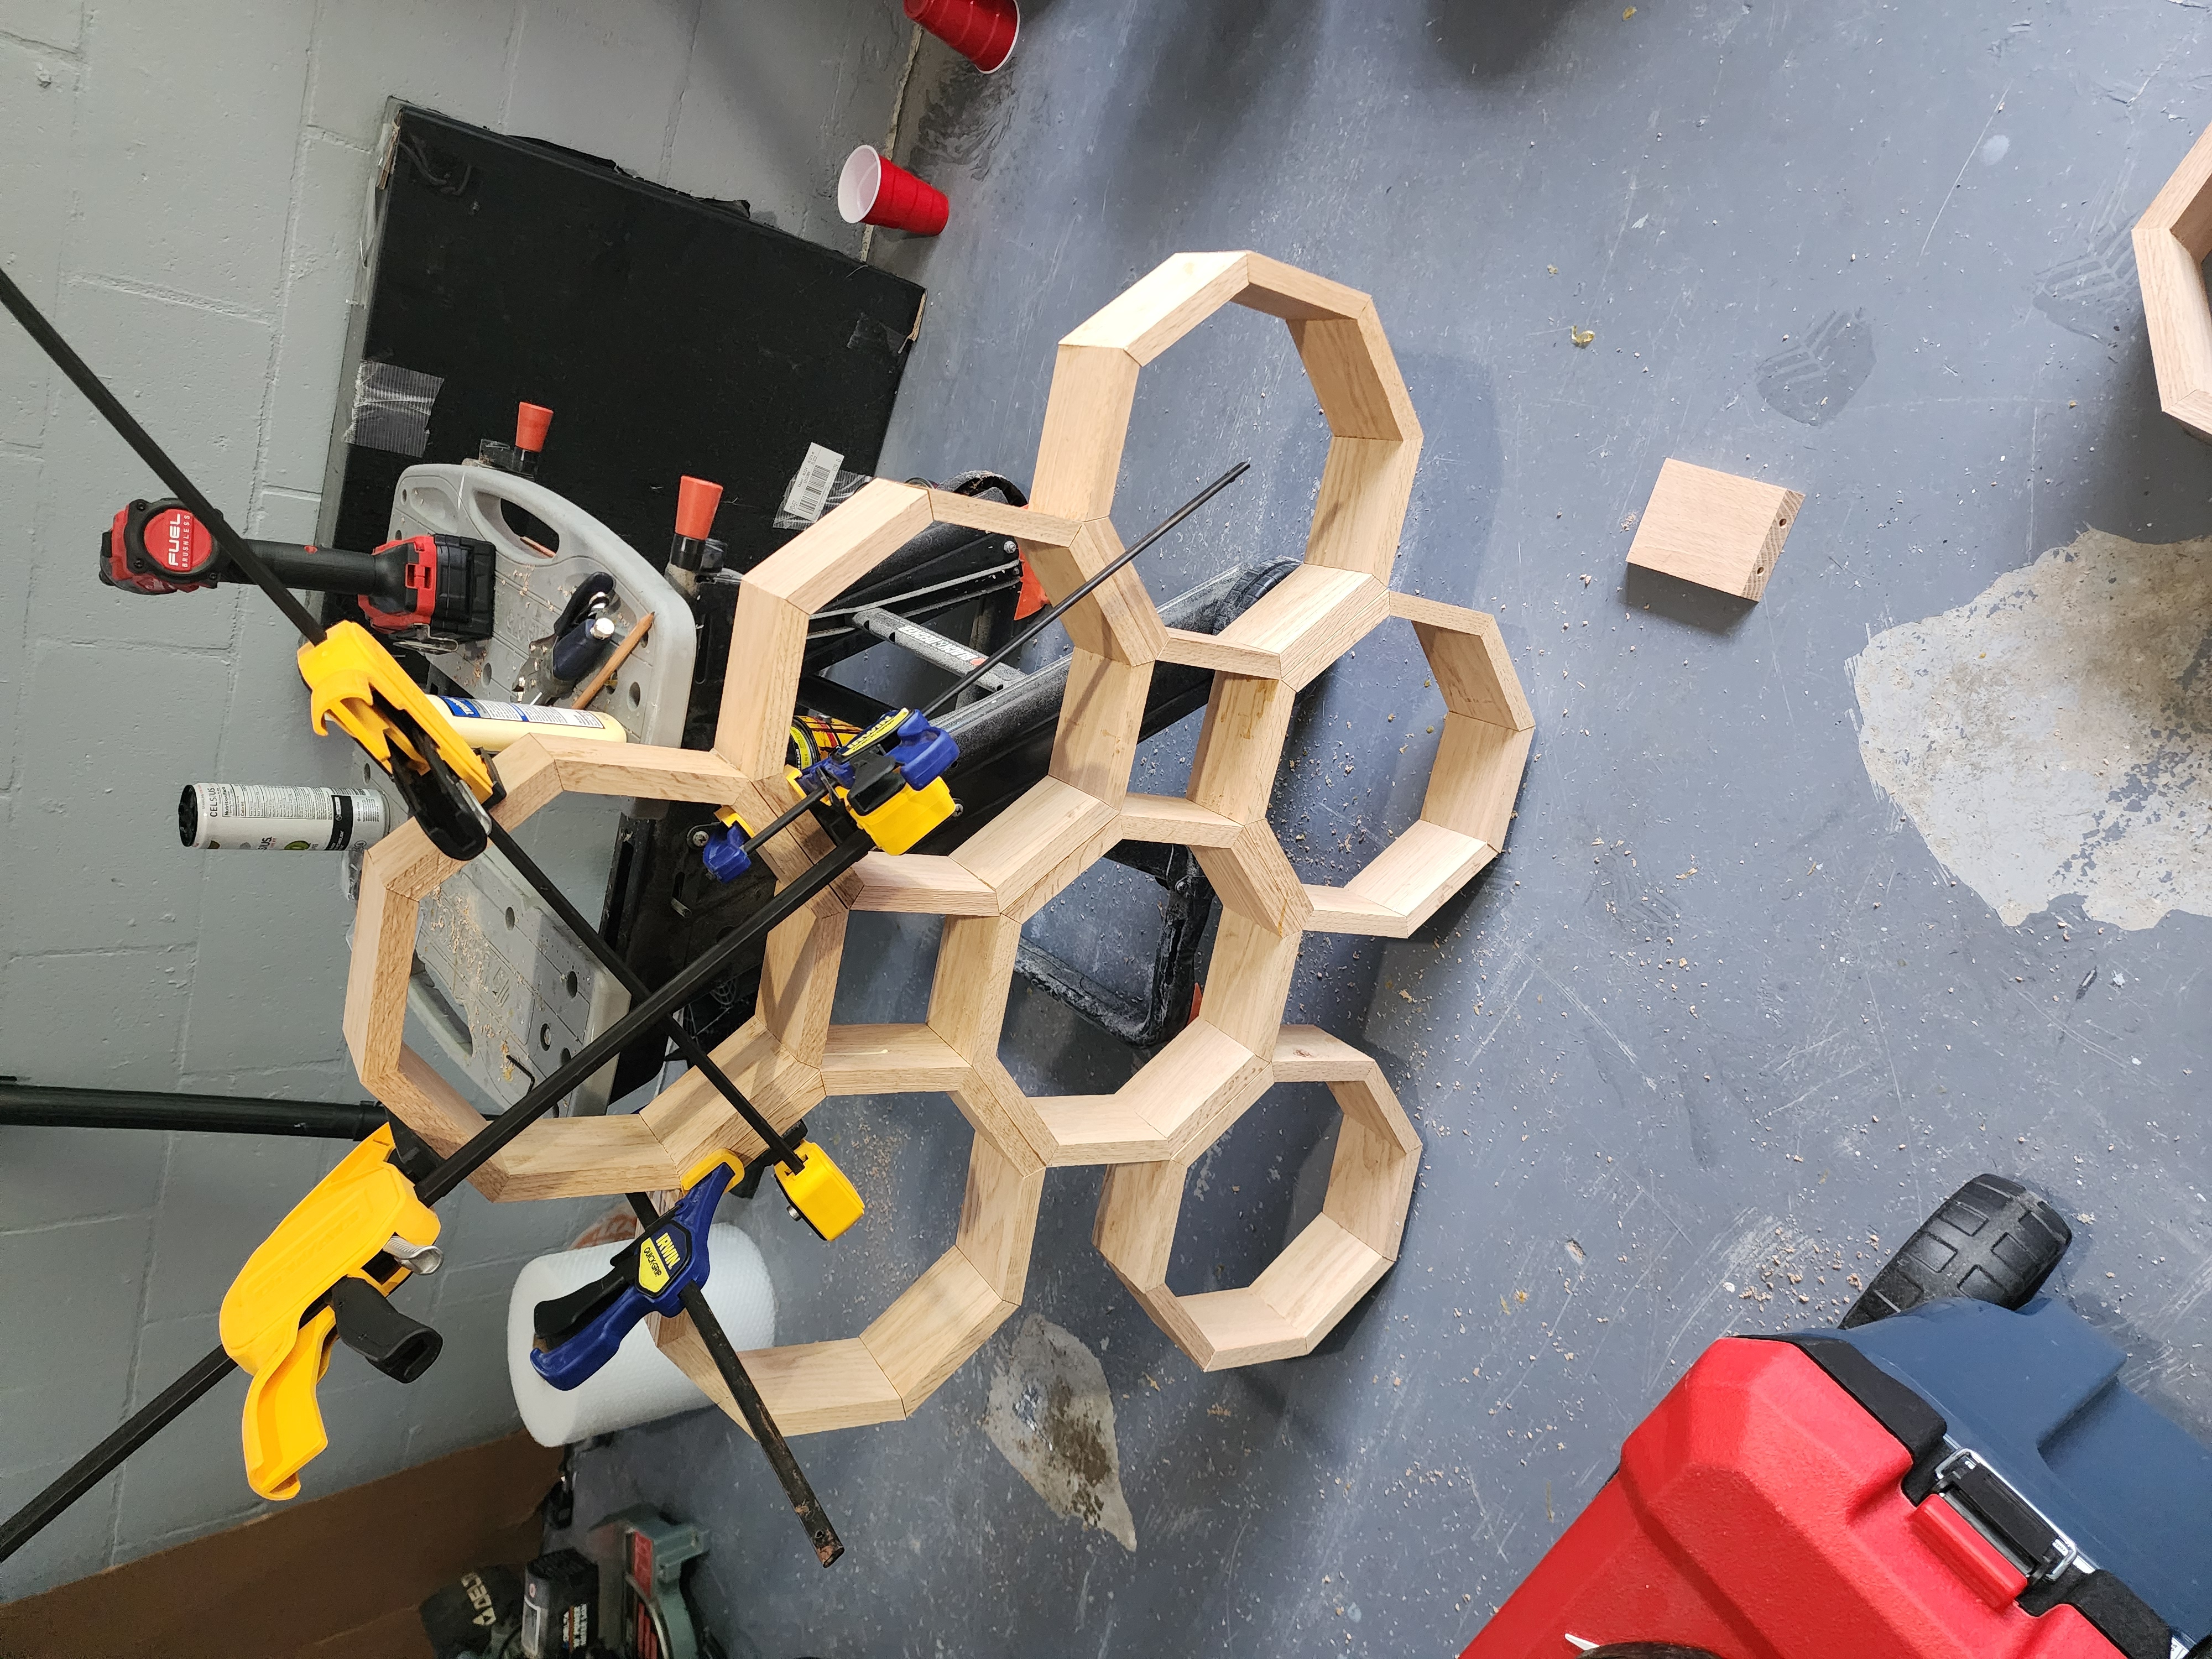
I have pretty big bare wall space in my place and wanted large pieces to hang in my livingroom area. I measured a spot to fit 3' x 3' and I imagined I could put a cool hexagon honeycomb shelf or something there. Enter octagonal design. I reasoned that I could use that design as a shelving unit for my knicknacks and things I've collected throughout the years.
An interesting display shelf, if you will.
I went out and bought some brand new, super expensive 1" x 4" red oak hardwood lumber. Putting more trust in myself than I normally do to finish something worth that much money. I wanted the piece itself to be beautiful and not just the things on it.
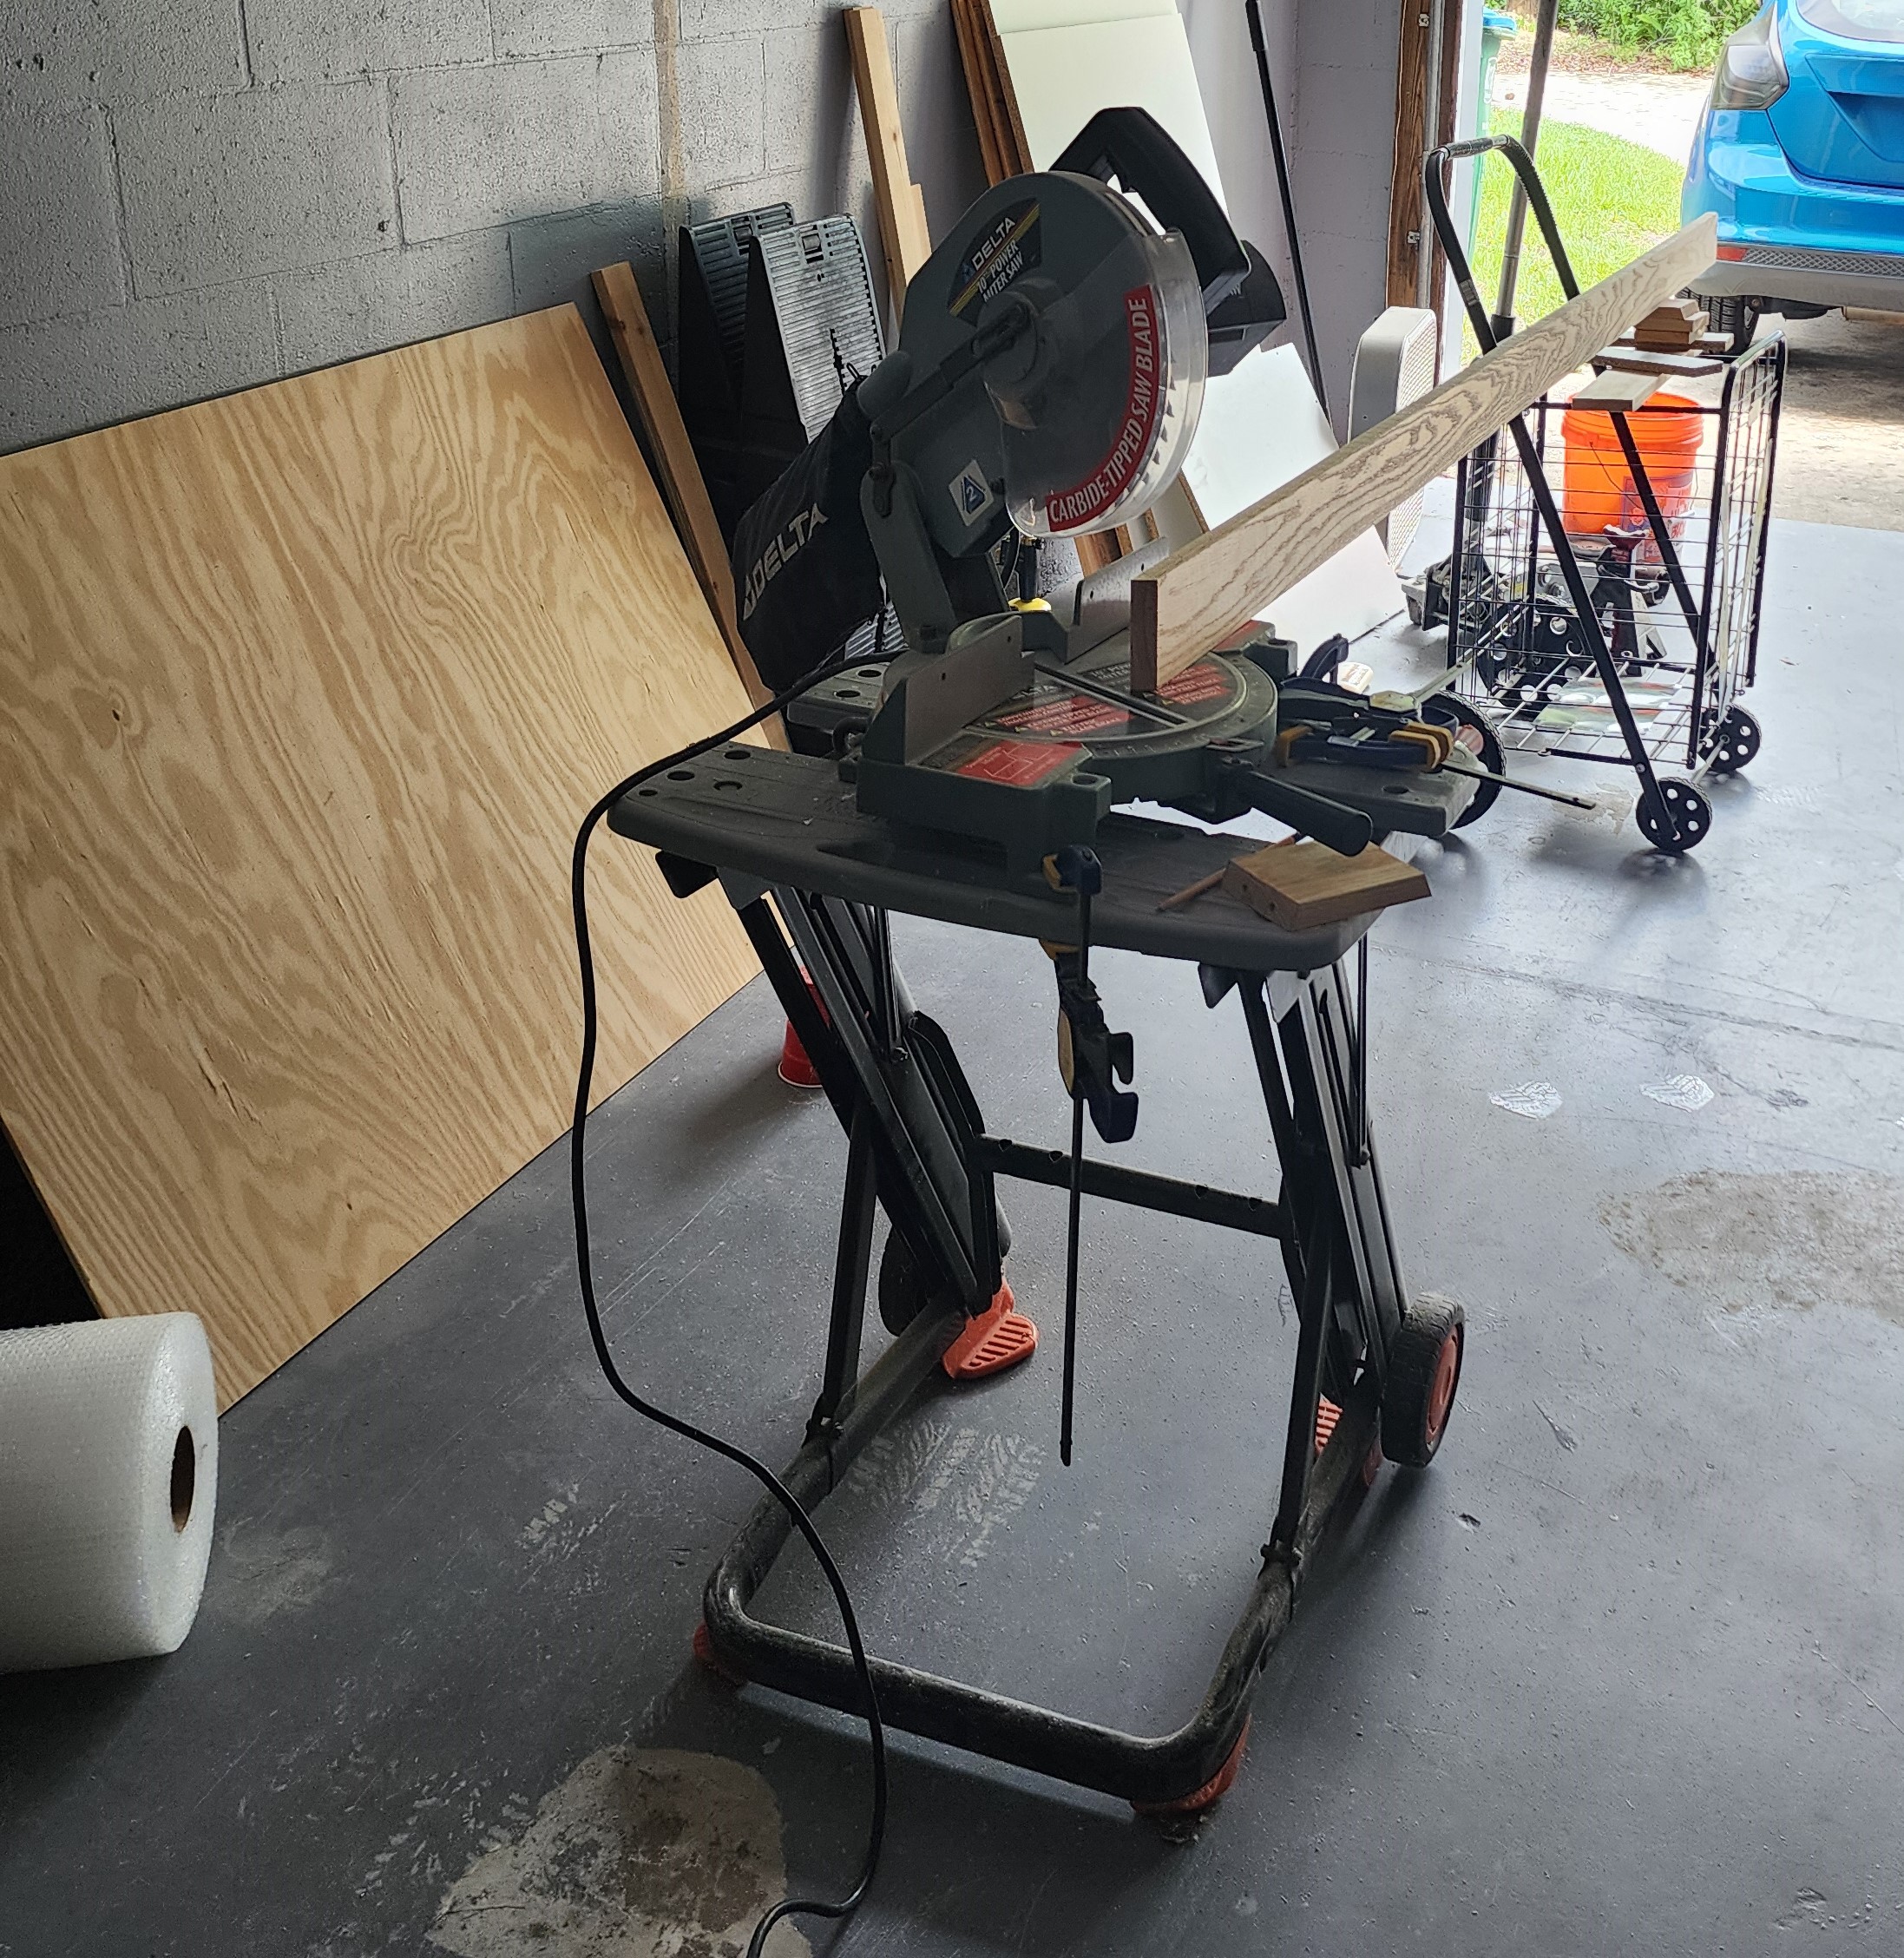
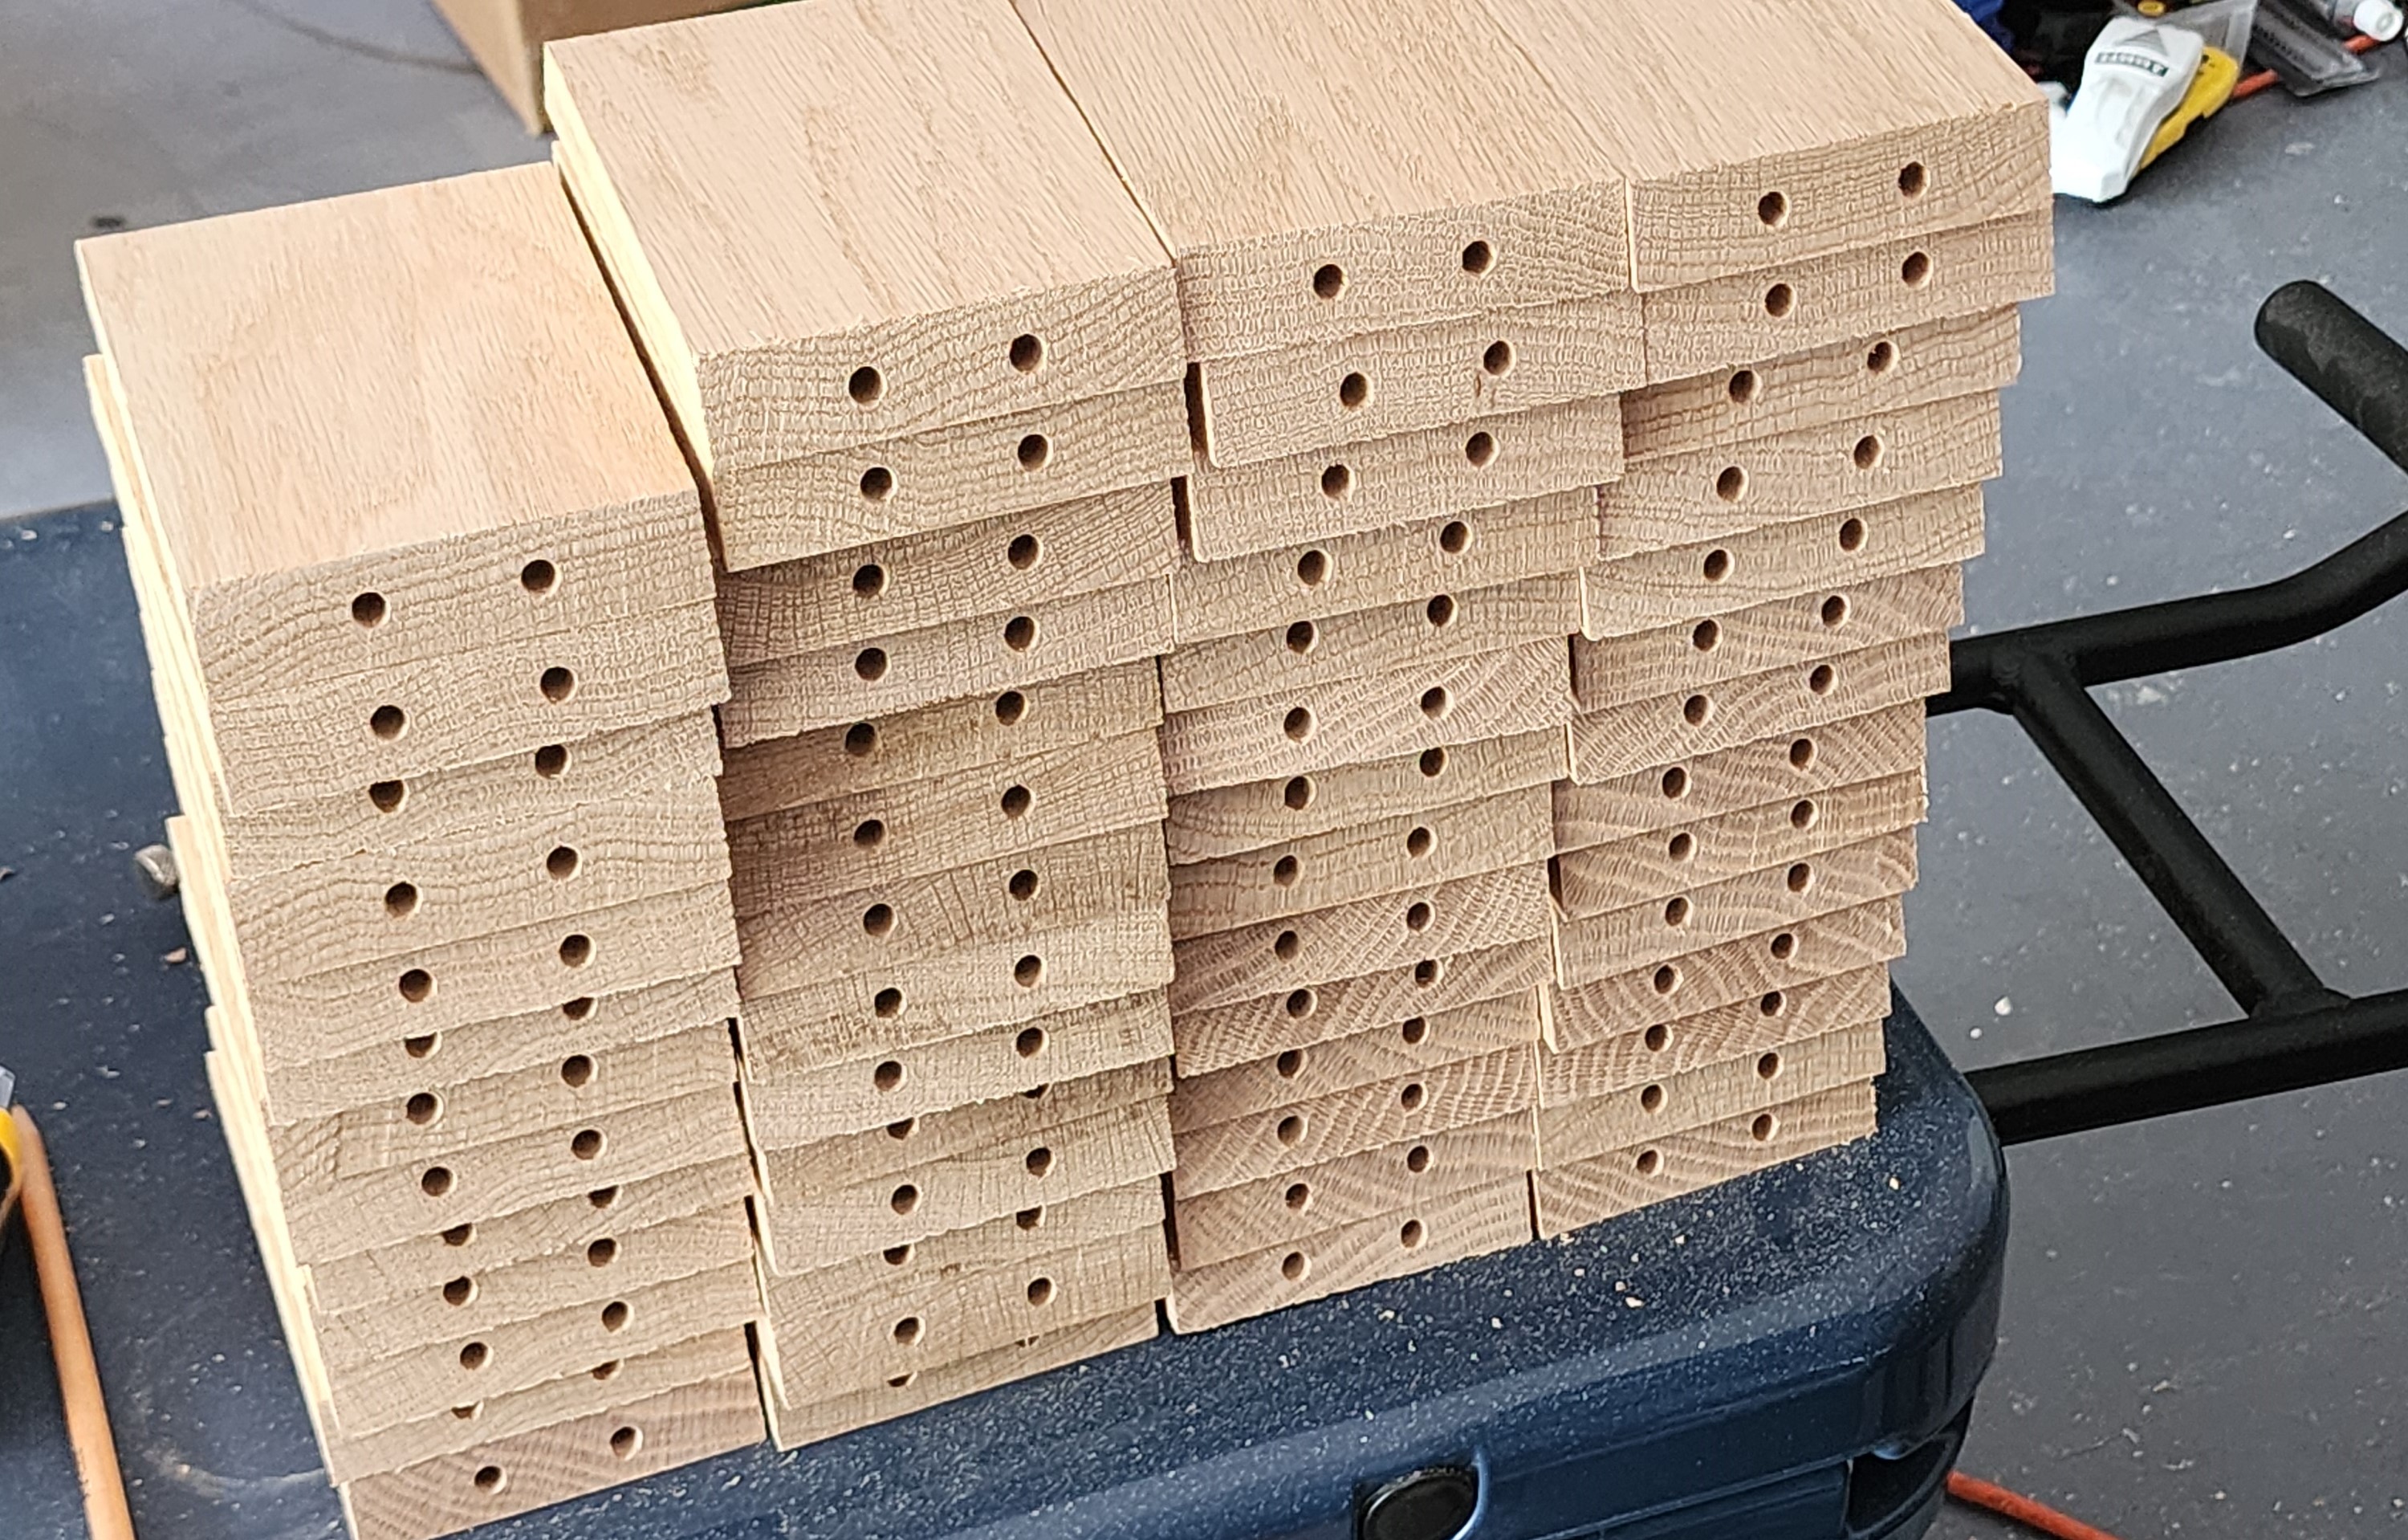
My first challenge was chopping the wood to usable size. I started on the floor with my miter saw set at 22.5° and got about 10 pieces cut before my back and knees reminded me that I'm nearing 40. I do not yet have a nice workshop setup for woodworking so I had to improvise for the remaining 54 pieces of wood.
Ancient Wisdom: Do as I say, not as I do.
What you are seeing is correct. No sawhorse and broke? Find random things to hold up lumber to your saw. I just happened to use an old grocery cart with some scrap wood across the top to hold the other end of these long pieces of lumber while I cut them. Seems safe enough. I also made sure I clamped down everytime I cut so I didn't have flying wood. This setup was sketchy but it enabled me to finish the remaining 54 pieces or 108 cuts in a day.
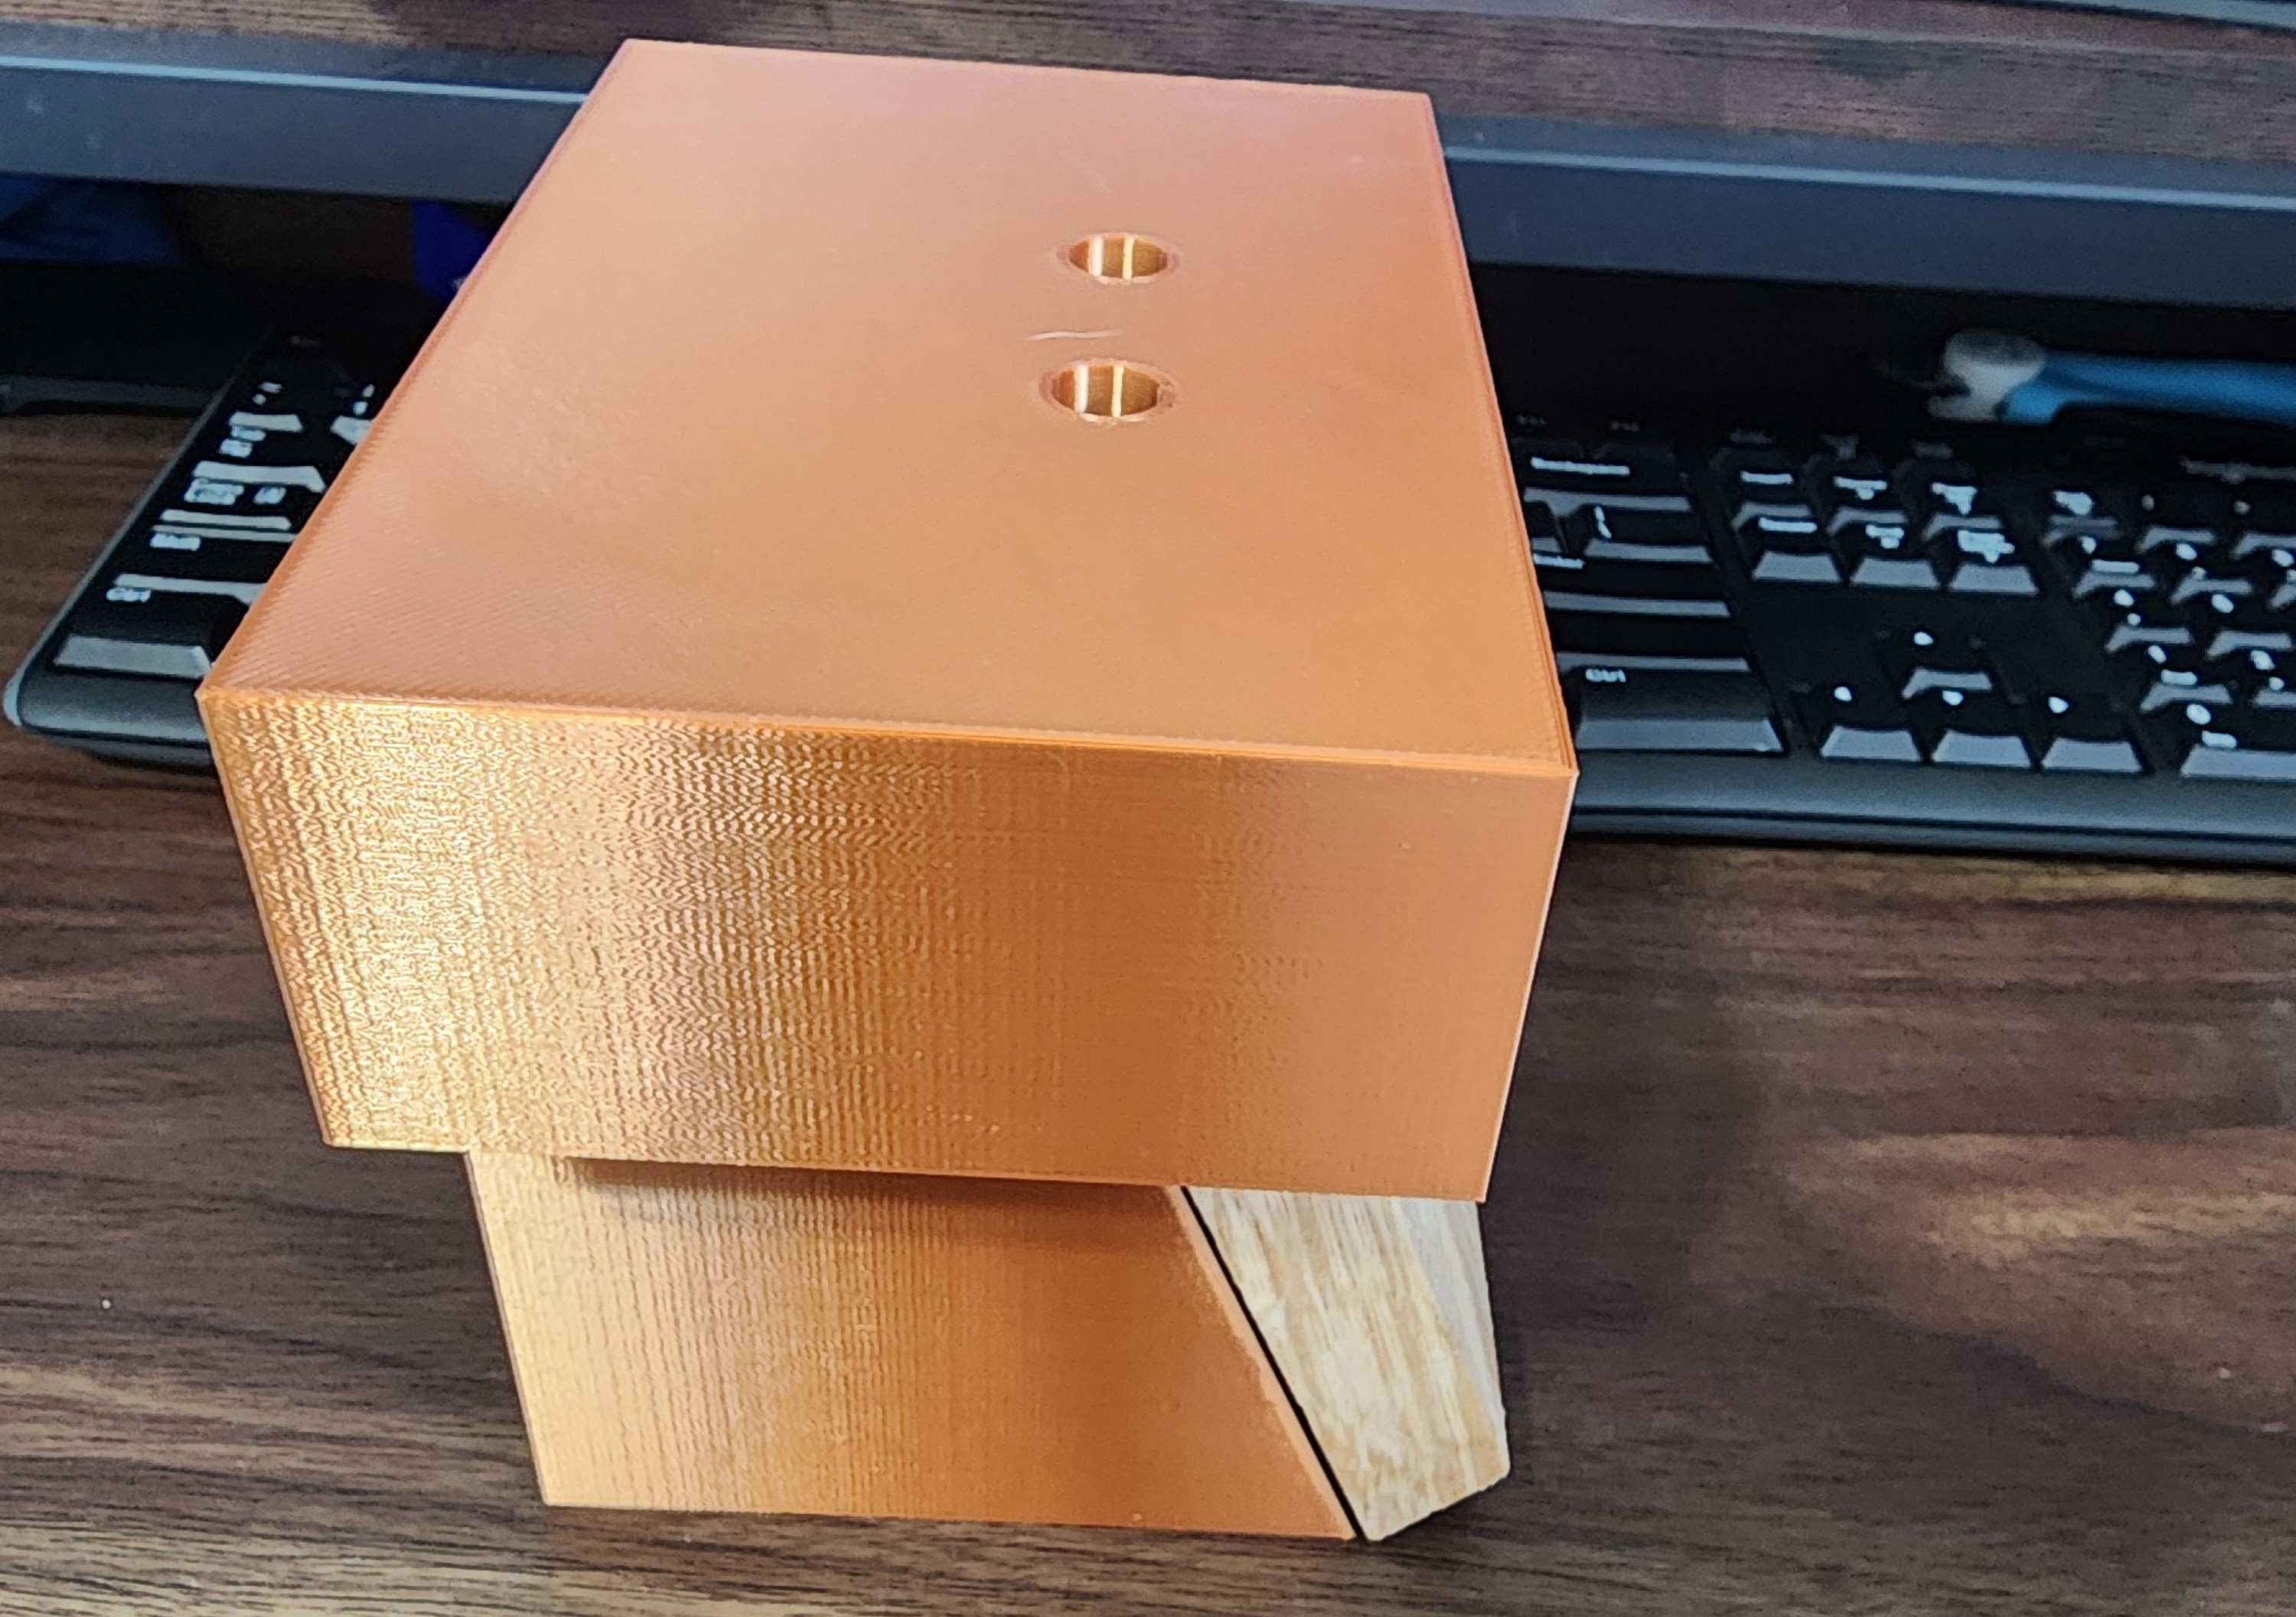
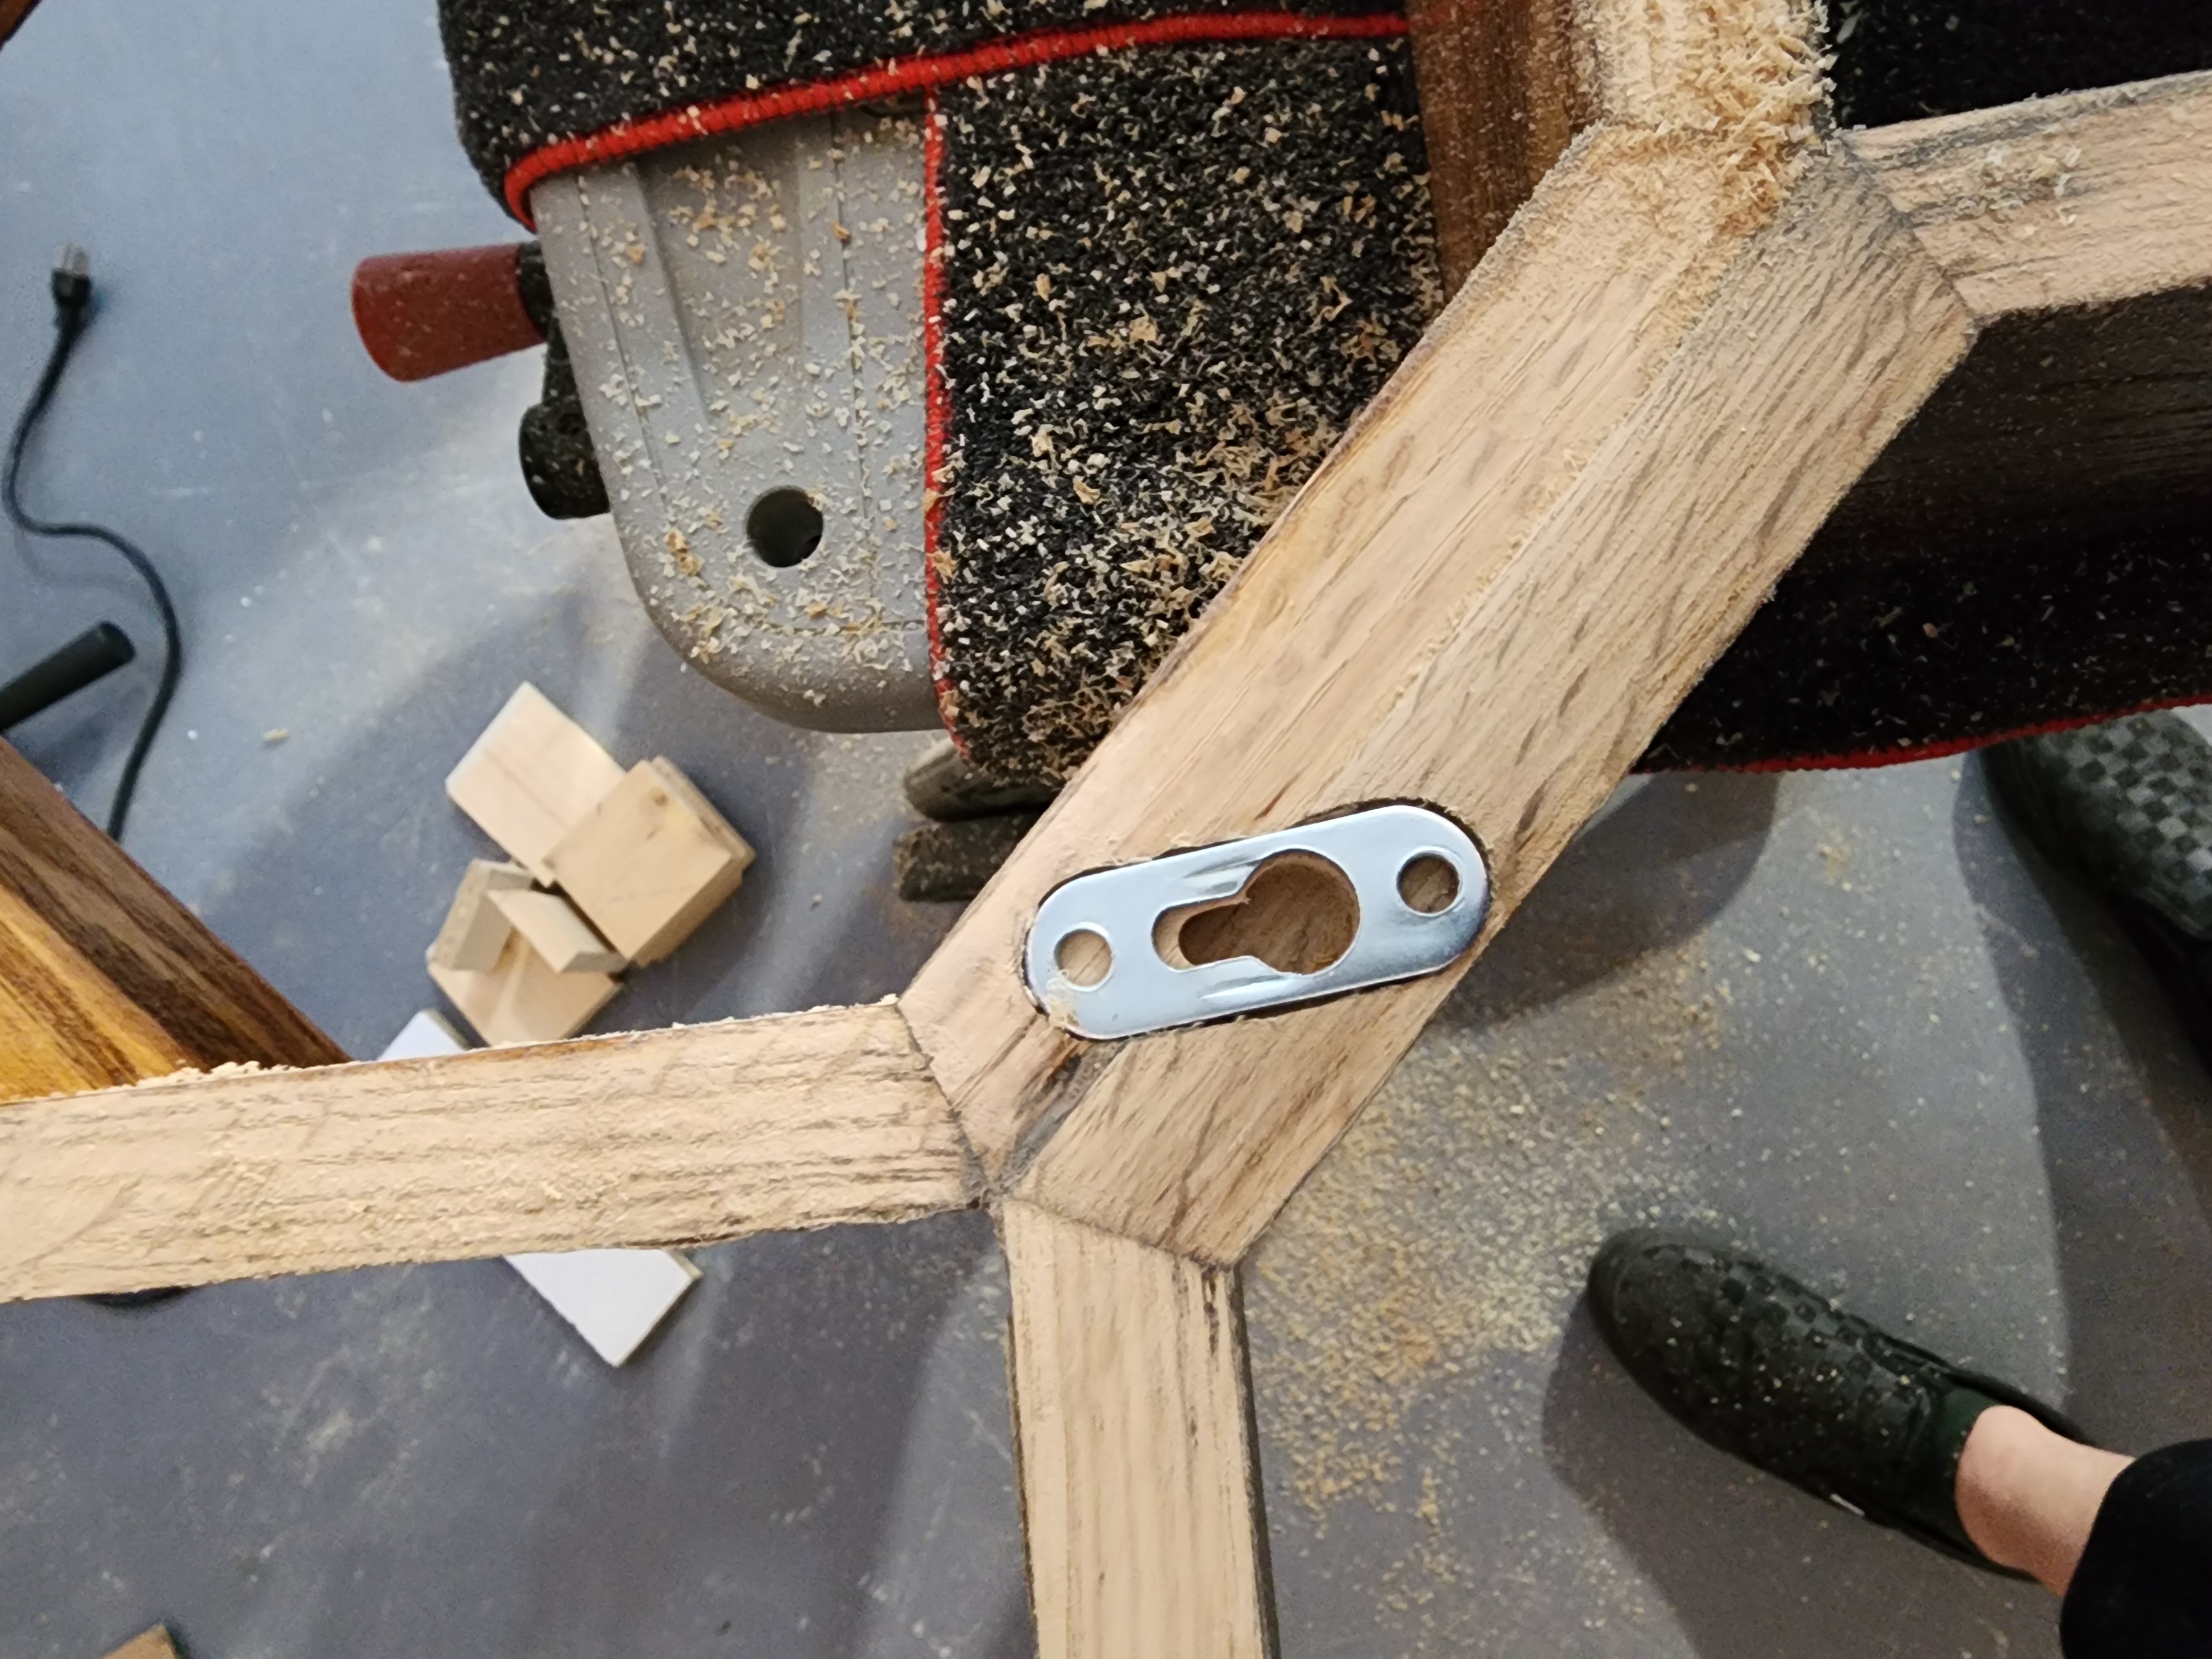
How do I make dowel holes at the precise angle needed to create the octagons?
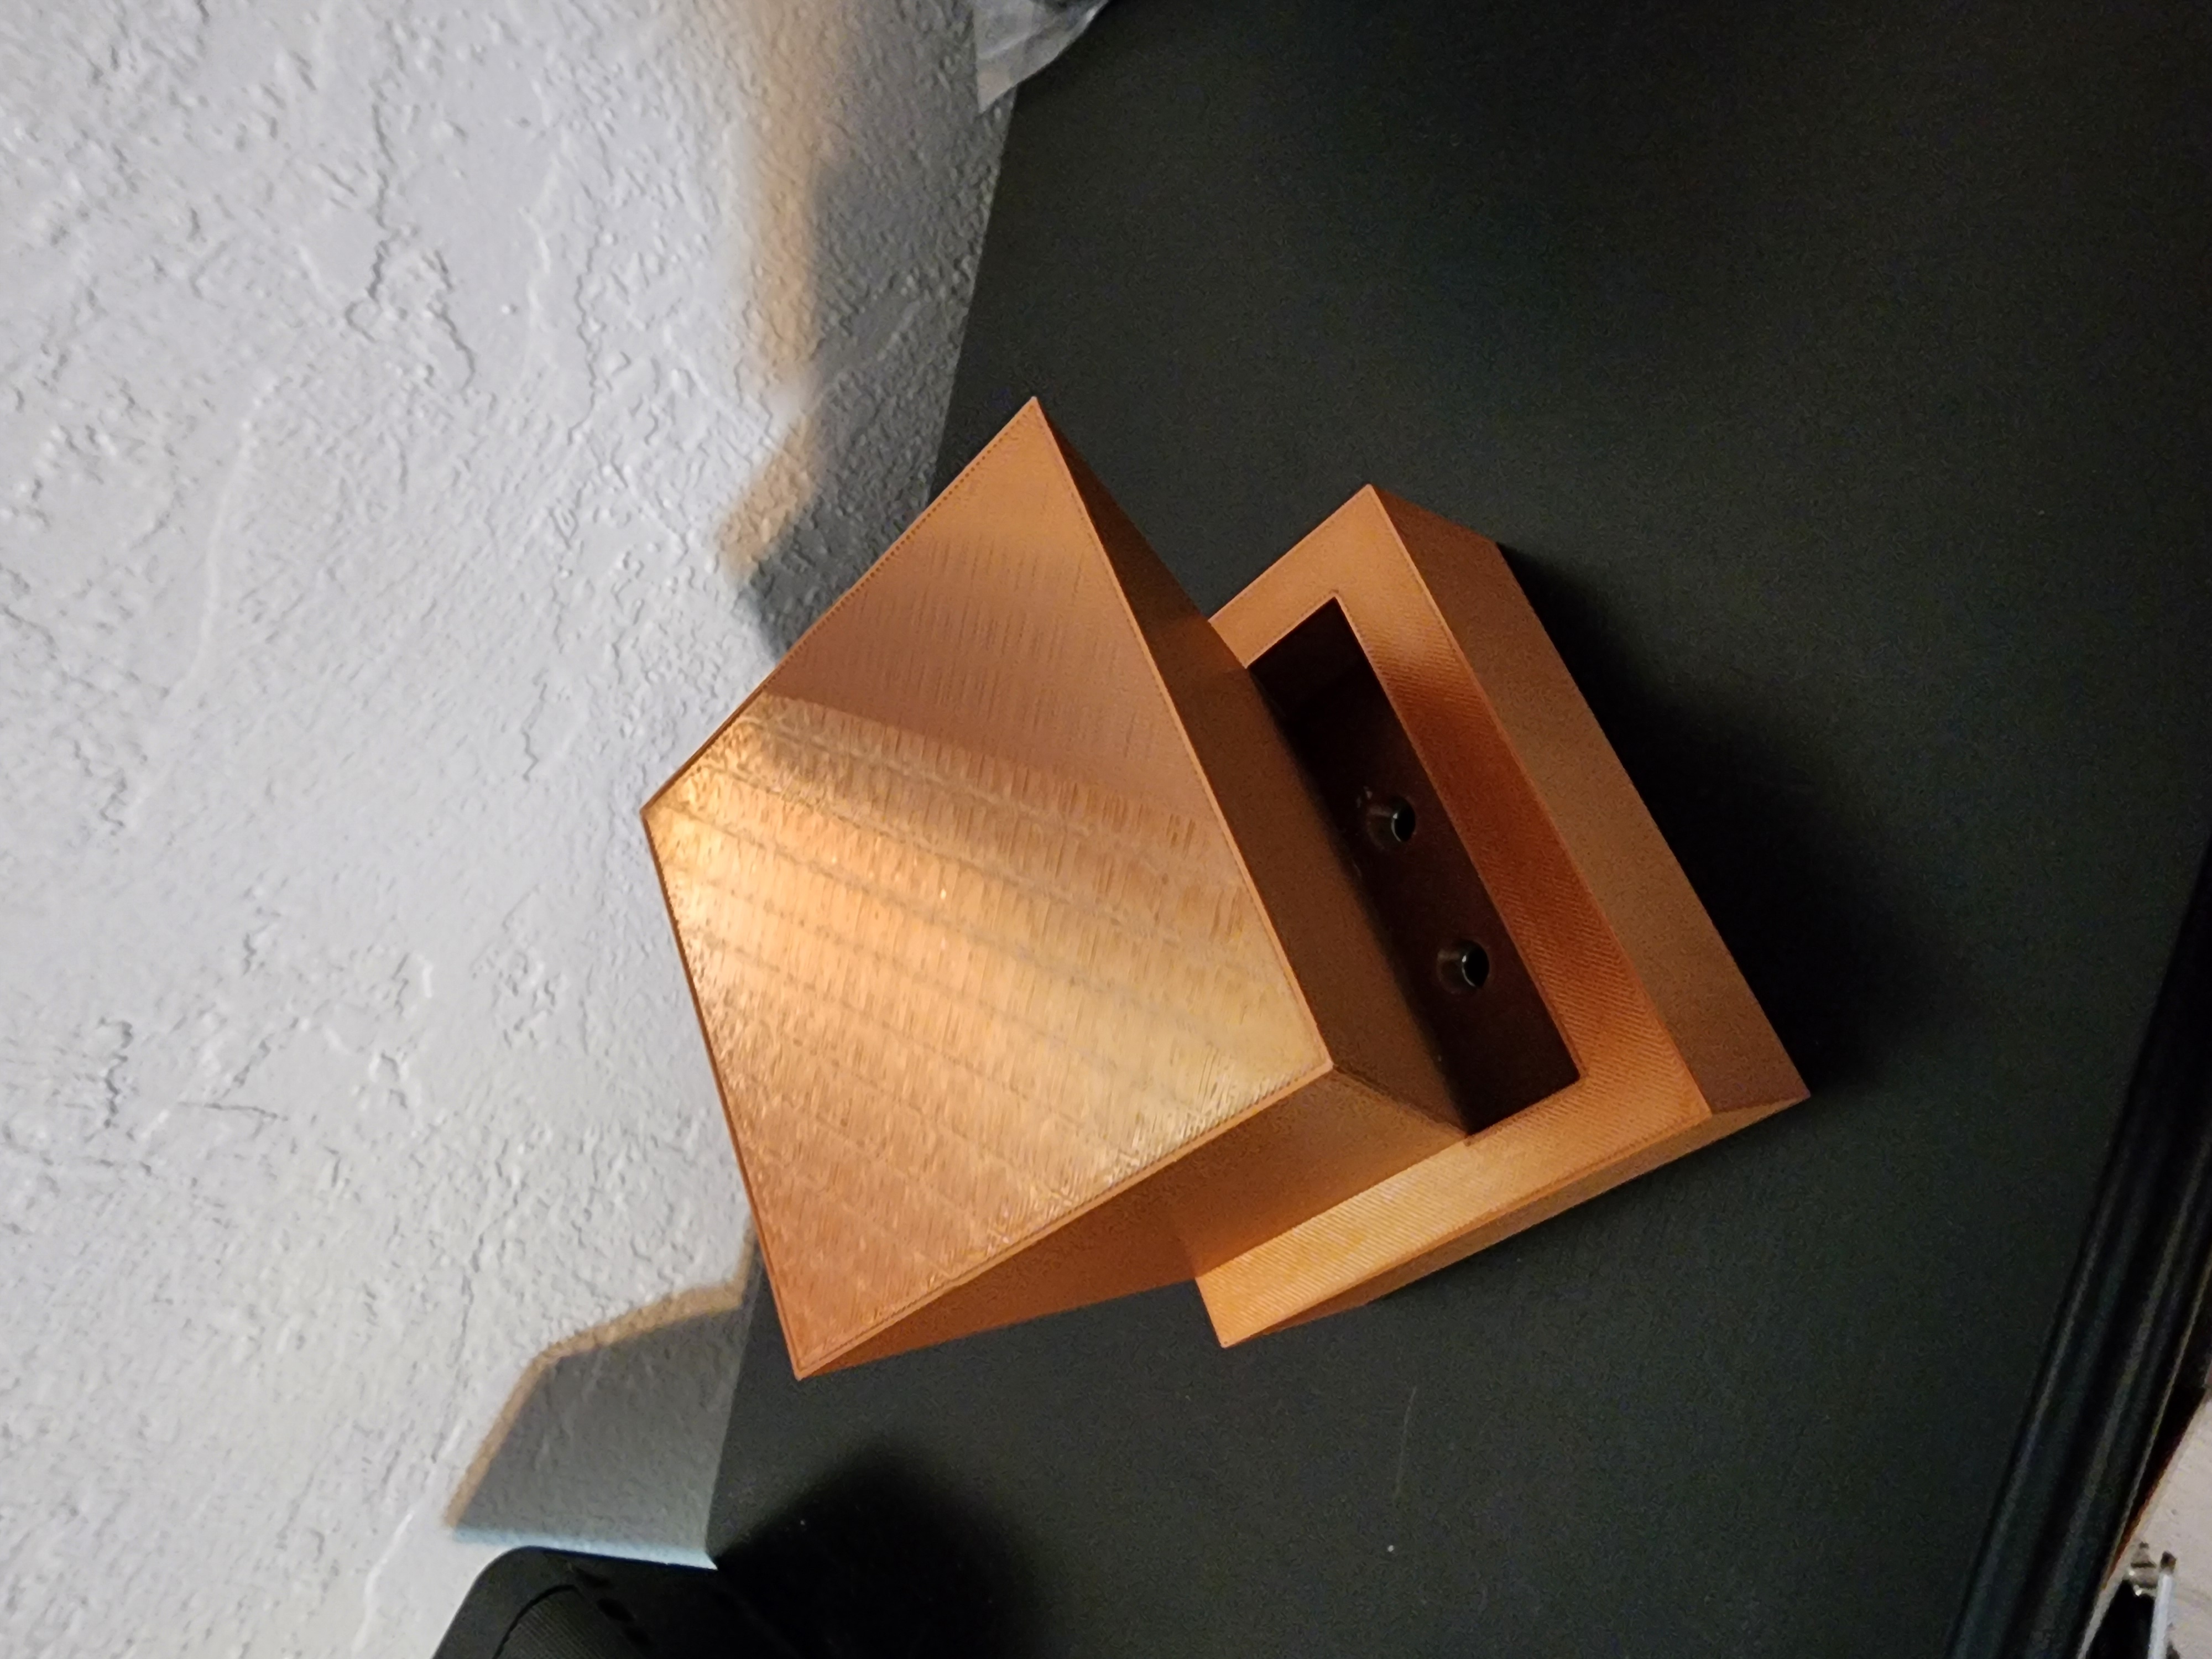
What if I use my 3D printing skills to create a drill jig? YES! I did quite a few experiments, 3 different models, before arriving at the solution that worked the best. I 3D printed a jig that holds the lumber at the angle needed to drill straight down through the top of the jig, through metal reinforced drill holes.

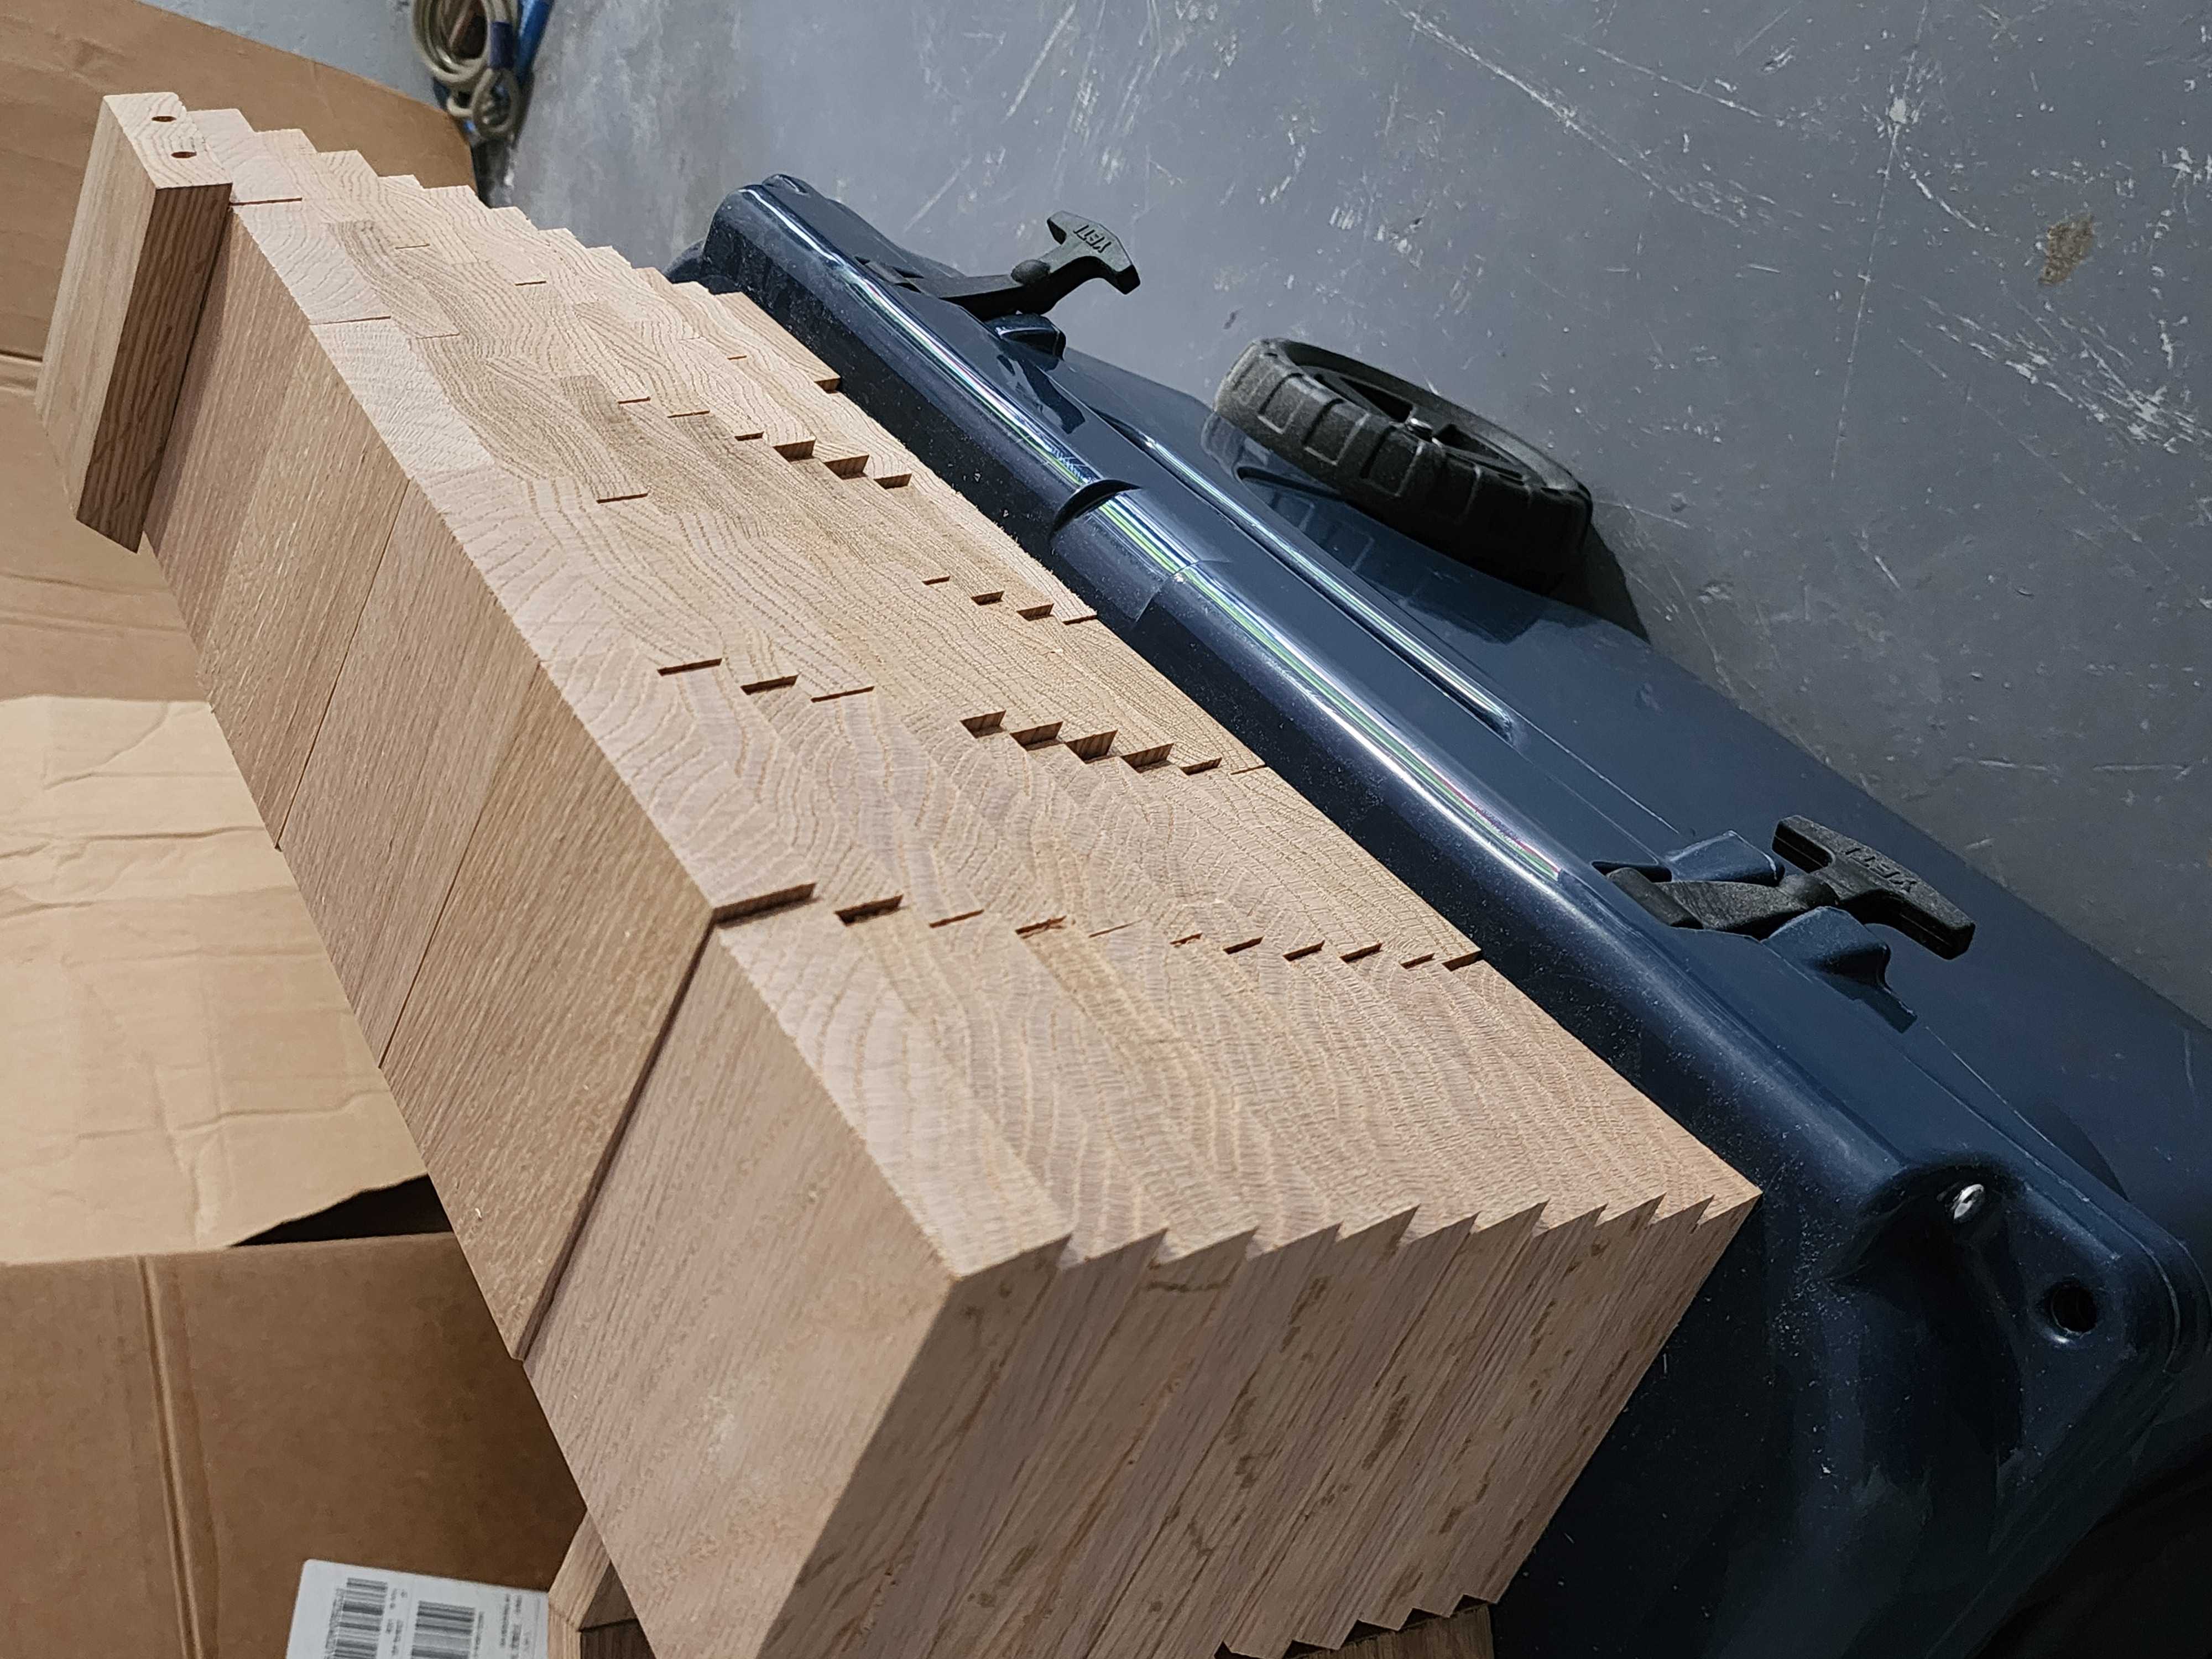
Took me another day or 2 of drilling the dowel holes with a drill bit stopper to drill all the pieces on both sides. This is some of the most laborious work I've done for fun. Felt like massive warehouse production summers again. I even accidentally gave myself heat exhaustion that left me foggy headed for a solid week. This Florida heat is SERIOUS.
Skip ahead to assembly of all the pieces. I could only really get away with one octagon a day since one required all of my clamps. 9 octagons total for the design.
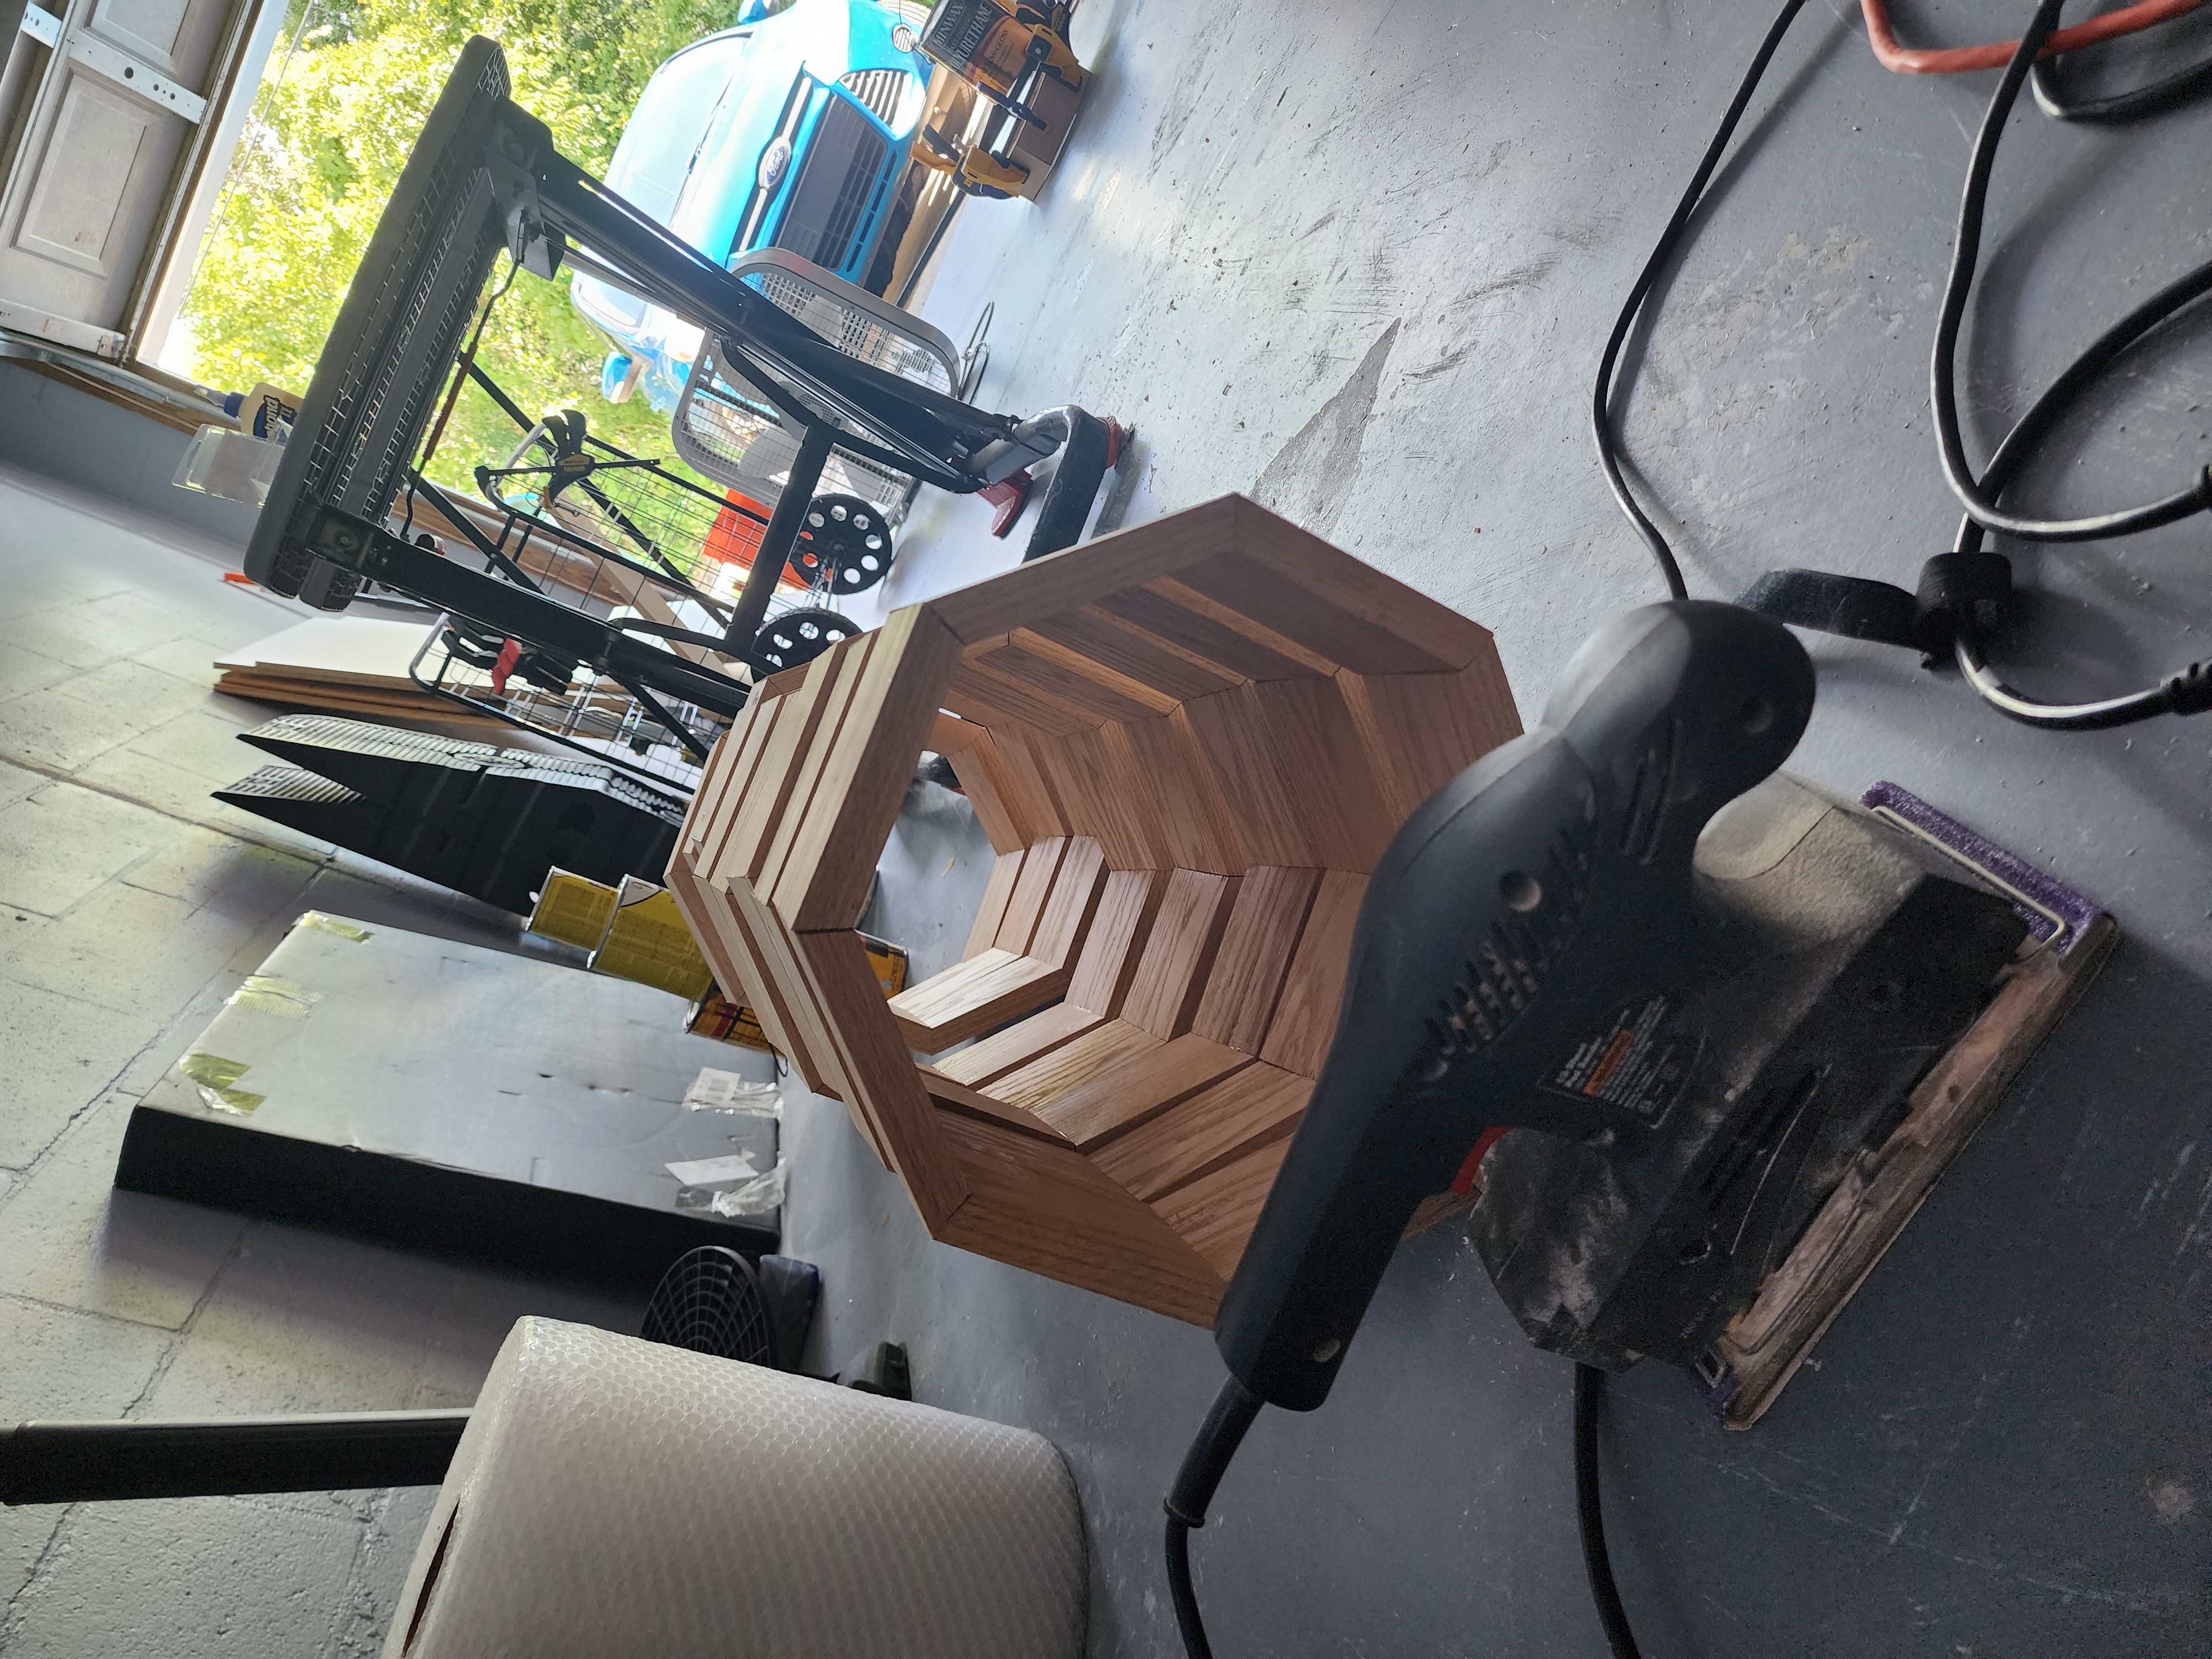
Drilling dowels on the octagon faces was WAY easier and didn't require a jig with the use of dowel punch pins.
Oh yeah and how to hang it up was also an interesting and nerve-wracking (!) challenge. Enter keyhole router and lot's of practice wood. It'll do.
Finishing was a long laborious process but let's skip ahead to the results. Three-toned stain (Red Mahogany, Cherry, & Black) and high gloss Poly finish. I dub thee 'Octashelf.'

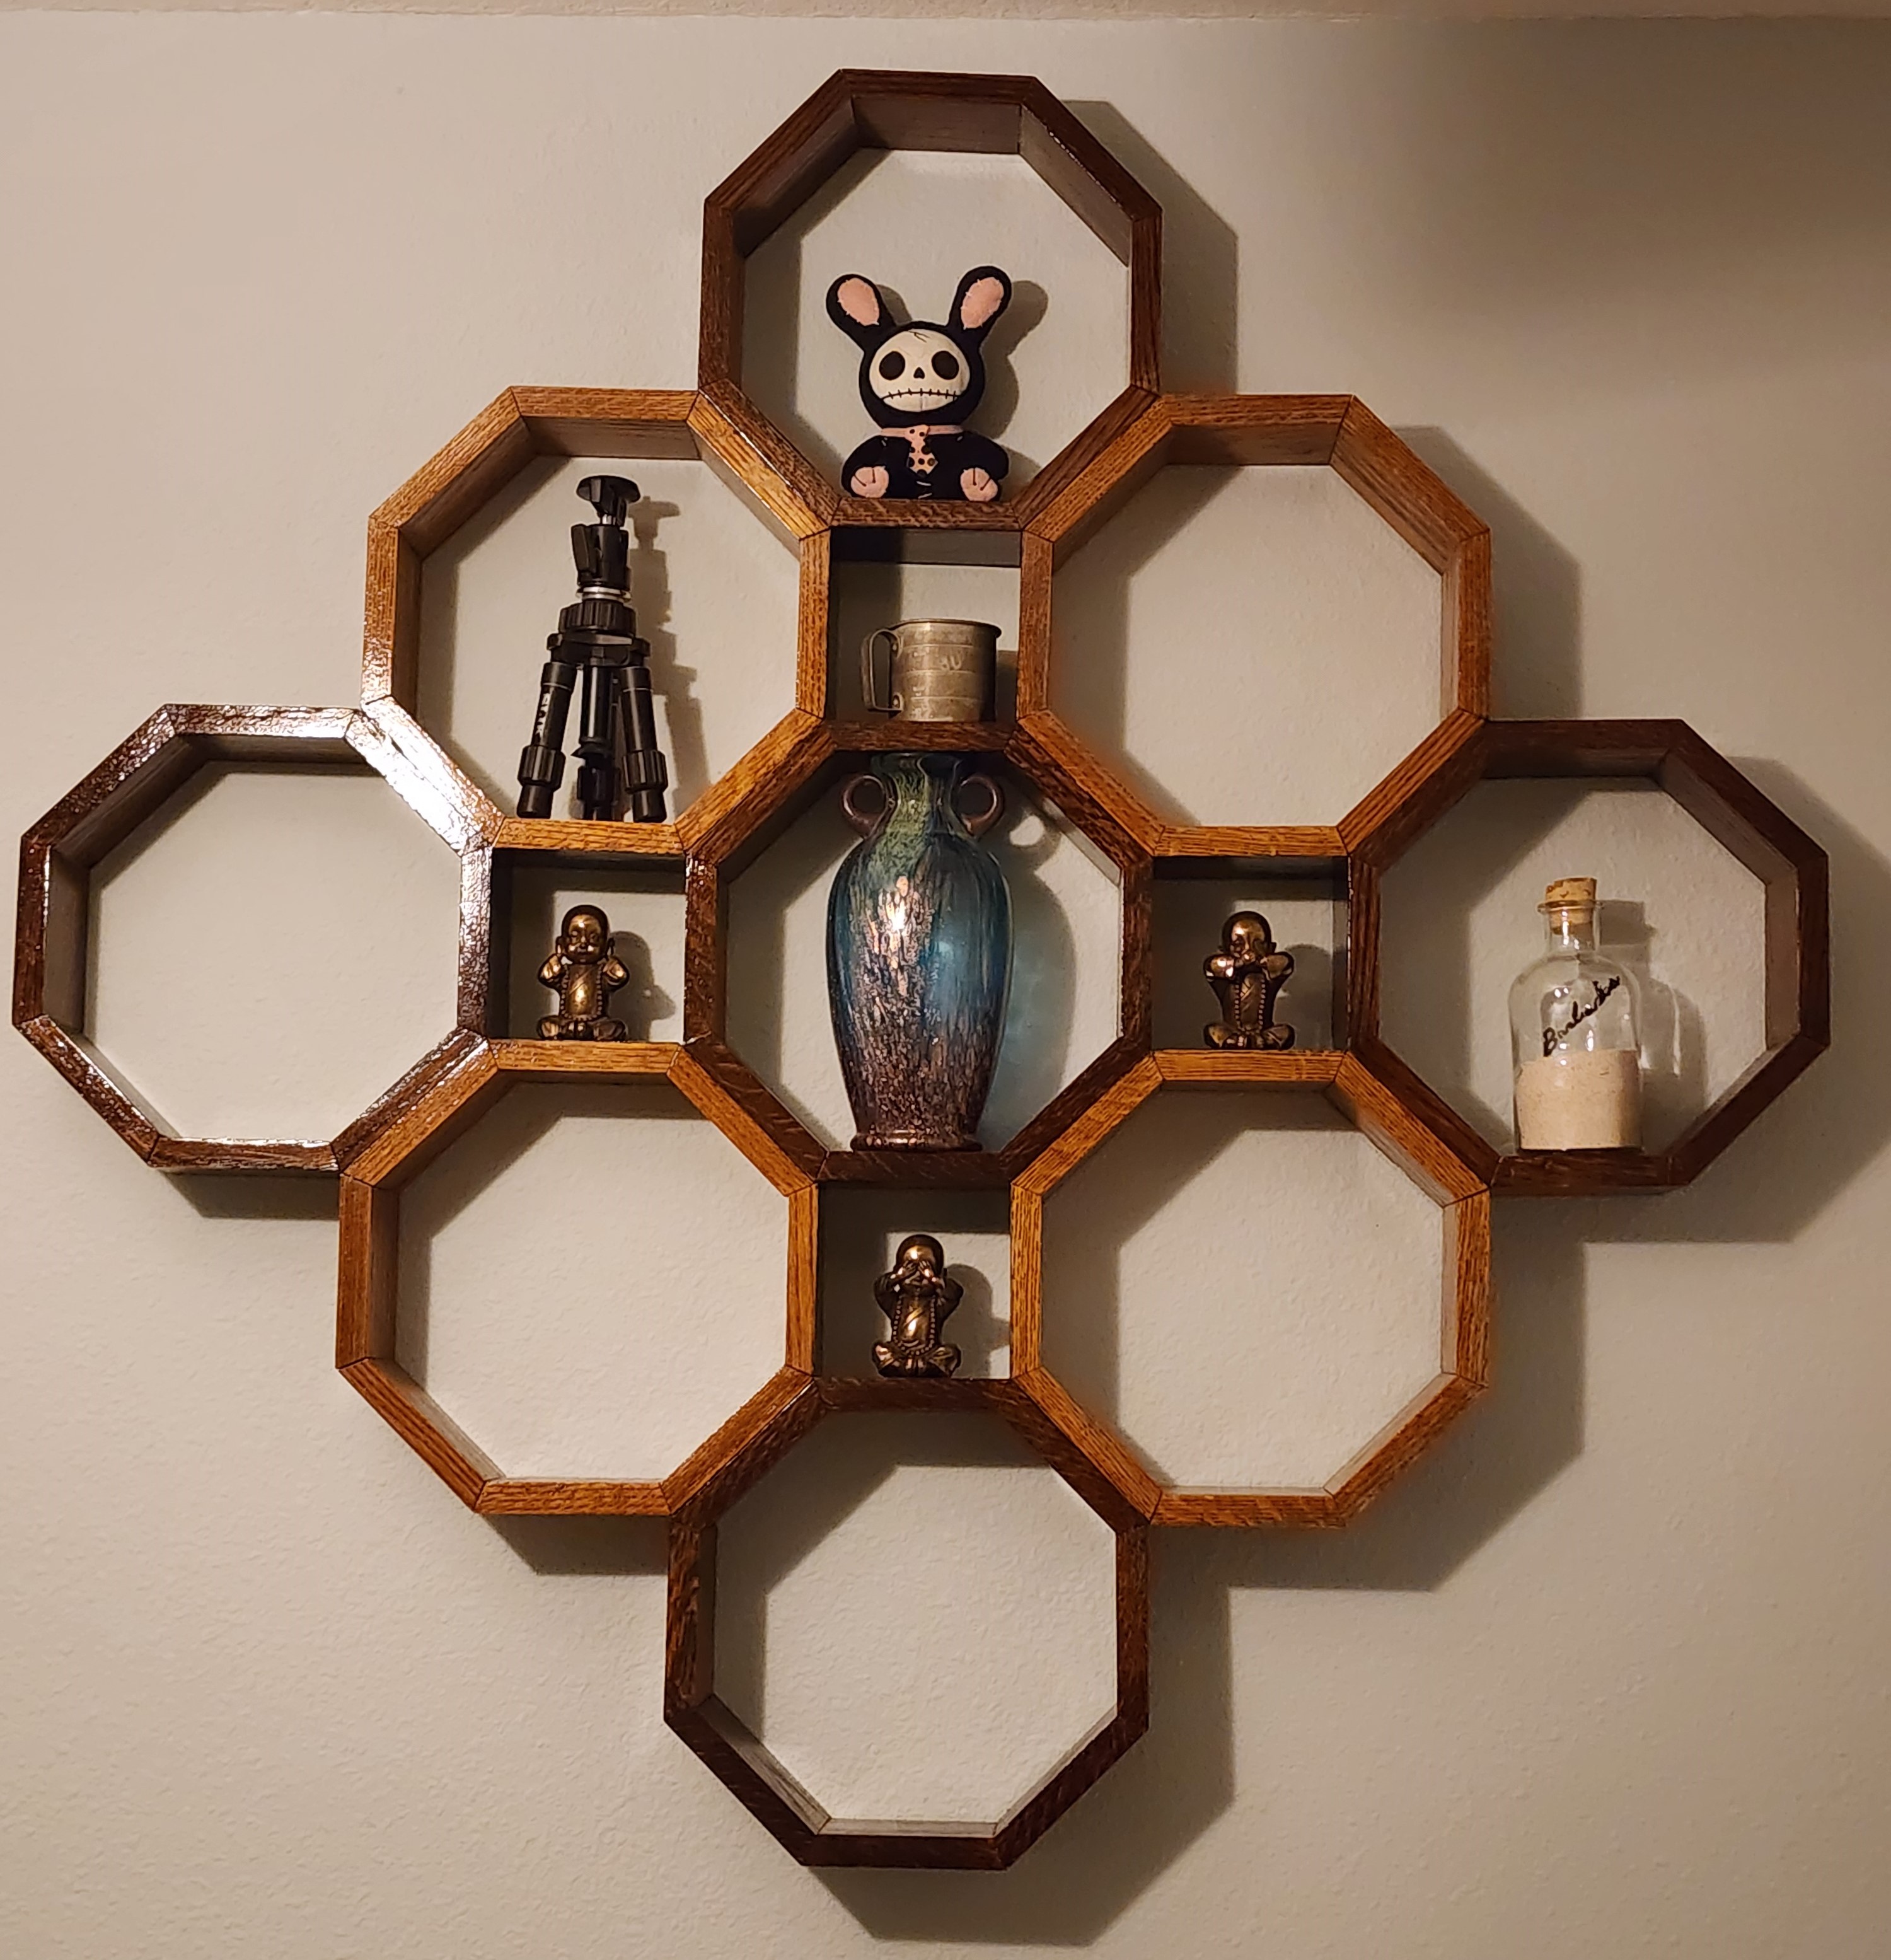
I'm still searching for the perfect things to occupy it!